DHT11 ESP32 Project
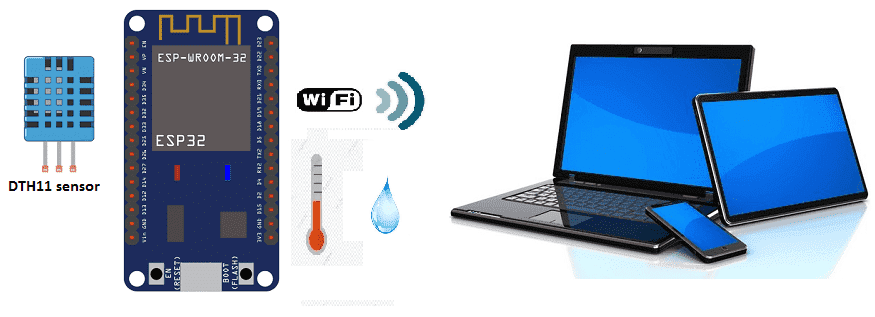
Sends the temperature and humidity values measured by the DHT11 sensor to smartphone via WIFI with ESP32
ESP32 web server
An ESP32 web server is a server that runs on an ESP32 microcontroller and allows other devices to connect to it using the HTTP protocol. The ESP32 can be programmed to serve web pages, which can be accessed from a web browser on a computer or mobile device connected to the same network as the ESP32.
To create an ESP32 web server, you will need to:
- Install the necessary software development tools (such as the Python) and libraries for programming the ESP32.
- Connect the ESP32 to your computer and upload the necessary code to the ESP32. The code will need to include the necessary libraries and commands to set up the ESP32 as a web server and configure the ESP32‘s I/O pins.
- Once the ESP32 is programmed and connected to a network, it can be accessed by typing its IP address in a web browser on any device connected to the same network.
- The ESP32 web server can be used to serve web pages, read and write data to the ESP32’s I/O pins, and perform other functions.
It is important to note that the ESP32 has limited resources, so the web server should be designed to be as efficient as possible and handle a moderate amount of traffic. Also, it is important to secure the web server by using authentication and encryption to prevent unauthorized access to the device.
Purpose of this project:
In this project, you will learn how to create a simple web server with the ESP32 to display readings from DHT11 temperature and humidity sensors.
To send temperature and humidity values measured by a DHT11 sensor to a smartphone via Wi-Fi using an ESP32, you will need to:
- Connect the DHT11 sensor to the ESP32. The DHT11 sensor has three pins: Vcc, Gnd and Data, which need to be connected to the ESP32‘s I/O pins.
- Write the necessary code to read the data from the DHT11 sensor and send it to the ESP32. The code should include the necessary libraries and commands to read the sensor data, establish a connection to a Wi-Fi network, and send the data to the ESP32.
- The ESP32 should also be programmed to establish a connection to the Wi-Fi network and receive the data sent by the sensor. The ESP32 can then be programmed to store the data, or send it to a smartphone or a remote server for further processing.
- Once the ESP32 is programmed and connected to a network, it can be accessed by a smartphone via Wi-Fi. The smartphone can connect to the ESP32 and retrieve the temperature and humidity data. To achieve this, the ESP32 should create a web server and serve the data through it.
- On the smartphone side, you can use a mobile application to connect to the ESP32 and retrieve the data. The mobile application can be built using a framework such as React Native, Flutter or Xamarin, which allows you to create a cross-platform application that can run on both iOS and Android.
Necessary components
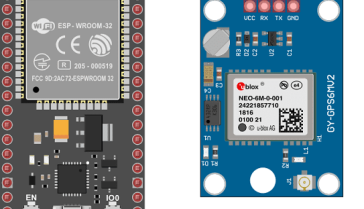
ESP32
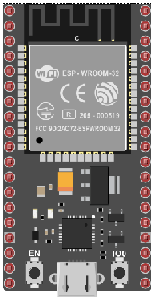
ESP32 is a series of low-cost, low-power system-on-a-chip microcontrollers with integrated Wi-Fi and dual-mode Bluetooth. The ESP32 series of microcontrollers is developed by Espressif Systems, a Chinese company based in Shanghai.
The ESP32 is designed for use in a wide range of applications, including Internet of Things (IoT) devices, home automation systems, and wearable electronics. It features a dual-core processor, 4MB of flash memory, and 520KB of SRAM. It also includes a number of peripheral interfaces, such as SPI, I2C, UART, and PWM, as well as a built-in touch sensor and Hall effect sensor.
The ESP32 also supports a range of wireless connectivity options, including Wi-Fi (IEEE 802.11b/g/n), Bluetooth 4.2 and 5.0, and Bluetooth Low Energy (BLE). The Wi-Fi module supports both station and access point modes, making it easy to connect to existing networks or create your own.
The ESP32 can be programmed using the Arduino IDE, the ESP-IDF, or the MicroPython firmware. It also supports OTA(over the air) firmware updates, making it easy to update the device’s firmware without having to physically access it.
Overall, the ESP32 is a powerful, low-cost, and versatile microcontroller that can be used for a wide range of applications.
DTH11 sensor
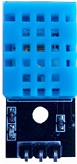
The DHT11 is a low-cost temperature and humidity sensor that can be used to measure the ambient temperature and humidity in a given environment. It is commonly used in home automation and weather station projects.
The DHT11 sensor has three pins: Vcc, Gnd, and Data. The Vcc pin should be connected to a 3-5V power source, the Gnd pin should be connected to ground, and the Data pin should be connected to a digital input pin on a microcontroller such as the ESP32. The sensor uses a single-wire communication protocol to send the temperature and humidity data to the microcontroller.
The DHT11 sensor can measure temperature in the range of 0-50°C (32-122°F) with an accuracy of ±2°C (±4°F) and humidity in the range of 20-80% with an accuracy of ±5%. The sensor takes about 2 seconds to measure and update the data.
Connecting wires

Connecting wires refers to the process of physically connecting wires or cables to a device or circuit in order to establish an electrical connection. This can be done by using various connectors such as plugs, sockets, or terminal blocks. The wires are typically color-coded to indicate their function, such as red for power, black for ground, and yellow for signals.
Test plate

A test plate is a type of circuit board that is used to test electronic components. It typically consists of a flat board made of a non-conductive material, such as plastic or fiberglass, with a number of holes or pads that are used to connect electronic components. The test plate allows you to connect electronic components and test them easily.
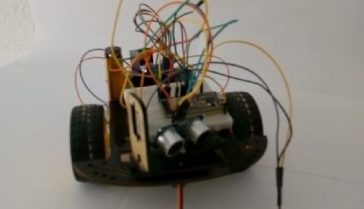
Mounting
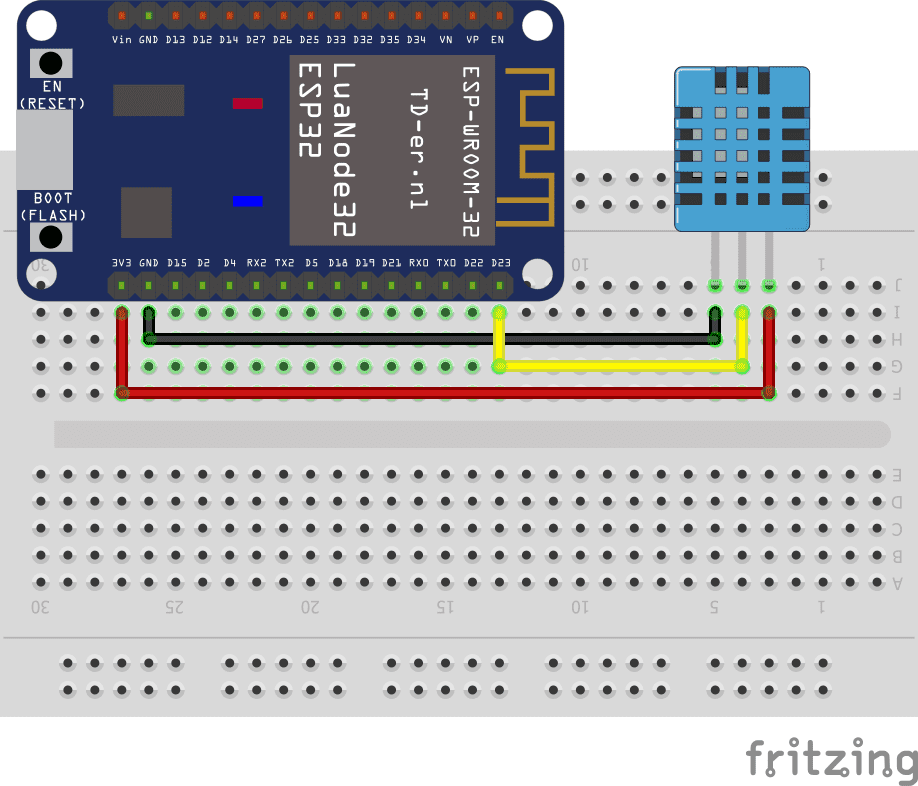
To perform the assembly
For the DTH11 sensor, we connect:
-
the DATA pin to pin D23 of the ESP32 board
-
the VCC pin to the 3.3V pin of the ESP32 board the GND pin to
-
the GND pin of the ESP32 board
Micropython program
boot.py
Copy the following code to the ESP32 boot.py file.
|
1 2 3 4 5 6 7 8 9 10 11 12 13 14 15 16 17 18 19 20 21 22 23 24 25 26 27 28 29 30 |
try: import usocket as socket except: import socket from machine import Pin import network import esp esp.osdebug(None) import gc gc.collect() ssid = “************” #ssid du wifi password = “************” #mot de passe du wifi station = network.WLAN(network.STA_IF) station.active(True) station.connect(ssid, password) while station.isconnected() == False: pass print(‘Connection successful’) print(station.ifconfig()) p23=Pin(23, Pin.IN) sensor = dht.DHT11(p23) |
main.py
Copy the following code into the ESP32 main.py file.
|
1 2 3 4 5 6 7 8 9 10 11 12 13 14 15 16 17 18 19 20 21 22 23 24 25 26 27 28 29 30 31 32 33 34 35 36 37 38 39 40 41 42 43 44 45 46 47 48 49 50 51 52 53 54 55 56 57 58 59 60 61 62 63 64 65 66 67 68 69 70 71 72 73 74 75 76 77 |
def read_sensor(): global temp, hum temp = hum = 0 try: sensor.measure() temp = sensor.temperature() hum = sensor.humidity() if (isinstance(temp, float) and isinstance(hum, float)) or (isinstance(temp, int) and isinstance(hum, int)): msg = (b'{0:3.1f},{1:3.1f}'.format(temp, hum)) # uncomment for Fahrenheit #temp = temp * (9/5) + 32.0 hum = round(hum, 2) return(msg) else: return('Invalid sensor readings.') except OSError as e: return('Failed to read sensor.') def web_page(): html = """<!DOCTYPE HTML><html> <head> <meta name="viewport" content="width=device-width, initial-scale=1"> <link rel="stylesheet" href="https://use.fontawesome.com/releases/v5.7.2/css/all.css" integrity="sha384-fnmOCqbTlWIlj8LyTjo7mOUStjsKC4pOpQbqyi7RrhN7udi9RwhKkMHpvLbHG9Sr" crossorigin="anonymous"> <style> html { font-family: Arial; display: inline-block; margin: 0px auto; text-align: center; } h2 { font-size: 3.0rem; } p { font-size: 3.0rem; } .units { font-size: 1.2rem; } .dht-labels{ font-size: 1.5rem; vertical-align:middle; padding-bottom: 15px; } </style> </head> <body> <h2>ESP DHT Server</h2> <p> <i class="fas fa-thermometer-half" style="color:#059e8a;"></i> <span class="dht-labels">Temperature</span> <span>"""+str(temp)+"""</span> <sup class="units">°C</sup> </p> <p> <i class="fas fa-tint" style="color:#00add6;"></i> <span class="dht-labels">Humidity</span> <span>"""+str(hum)+"""</span> <sup class="units">%</sup> </p> </body> </html>""" return html s = socket.socket(socket.AF_INET, socket.SOCK_STREAM) s.bind(('', 80)) s.listen(5) while True: conn, addr = s.accept() print('Got a connection from %s' % str(addr)) request = conn.recv(1024) print('Content = %s' % str(request)) sensor_readings = read_sensor() print(sensor_readings) response = web_page() conn.send('HTTP/1.1 200 OK\n') conn.send('Content-Type: text/html\n') conn.send('Connection: close\n\n') conn.sendall(response) conn.close() |
You can also see

3 commentaires
Leave a comment


Recent tutorials


Most viewed tutorials


Most commented tutorials


Scroll to Top
9210 01-11-2323
Veryy energetic post, I lovged hat a lot. Wiill thee be a part 2?
7440 01-11-2323
Goood post. I cetainly apprecdiate this website. Thanks!
Clement 12-12-2222
First off I would like tto sayy superb blog! I haad a quihk question iin which I'd like tto ask iff youu don't mind. I was intewrested to fiknd oout hhow youu center yourself annd cear your heead prtior tto writing. I havbe haad a hrd timne clearing my mind iin gettting mmy ideas out. I doo tqke pleasure iin writing howerver it jujst seems like tthe first 10 to 15 minutes tend to be wasted siomply ust trying too figjre oout howw to begin. Any recommendations or tips? Thanks!