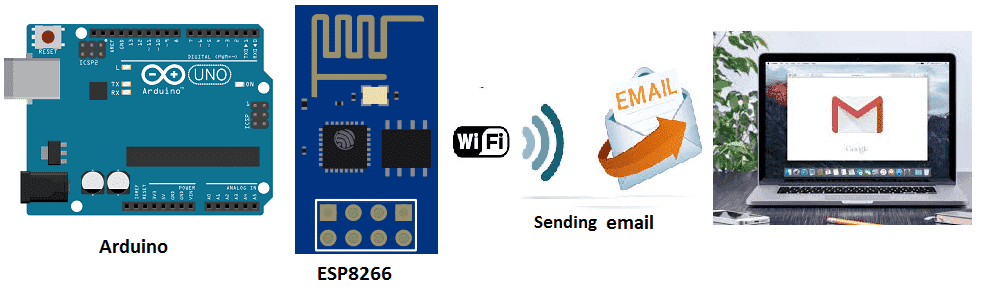
Arduino ESP8266 Internet of things
Sending an email by Arduino
SMTP server overview
Simple Mail Transfer Protocol (SMTP) is a protocol for sending email messages between servers. Most email systems that send mail over the Internet use SMTP to send messages from one server to another, as well as to deliver messages to local mail clients like Microsoft Outlook or Apple Mail.
An SMTP server is a computer or application that is responsible for receiving, forwarding, and delivering email messages. When an email is sent, it is first sent to an SMTP server, which then forwards it to the recipient’s email server. The recipient’s email server will then deliver the email to the recipient’s mail client.
An SMTP server typically listens on port 25 for incoming email messages, however, many email providers use different ports or different security protocols, such as STARTTLS or SSL/TLS.
An SMTP server can be configured with different settings and options, such as the server’s hostname and IP address, the domain name, the email address of the administrator, and the maximum number of recipients per message.
Some popular SMTP servers are:
- Postfix
- Exim
- Sendmail
- Microsoft Exchange Server
- Google G Suite
- Amazon SES
It is important to mention that an SMTP server requires an email account and the appropriate credentials to send an email, also it requires the recipient email server to be able to receive the message, otherwise it will be rejected.
Purpose of this tutorial:
The Arduino is a popular microcontroller board that can be used to create a wide range of projects, including sending and receiving email. This can be accomplished by connecting the Arduino to a device such as an ESP8266 or ESP32 Wi-Fi module, which can be programmed to send and receive email using the Simple Mail Transfer Protocol (SMTP) and Post Office Protocol (POP) protocols.
There are a few different libraries available that can be used to send and receive email with an Arduino and an ESP8266 or ESP32 module, such as ESP8266Mail and ESP32Mail. These libraries make it easy to send and receive email by handling the low-level details of the SMTP and POP protocols, and provide a simple API for sending and receiving email.
To send an email with an Arduino and an ESP8266, you will need to connect the ESP8266 to the Arduino and then write a sketch (program) that uses the ESP8266Mail library to send an email. The sketch must be configured with the correct email server settings and credentials, and then it can be used to send an email with the desired message and recipient.
The process for receiving email is similar, it requires a sketch that uses the ESP8266Mail library to check for new email and retrieve them.
It is important to mention that sending and receiving email with an Arduino and ESP8266 is not the most efficient way to accomplish this task, it is recommended to use a fully-featured device such as a computer or a smartphone. However, it can be a fun and educational way to learn about networking and email protocols.
In this tutorial we will send an email with the Arduino board when a push button is pressed.
First, we must use an SMTP server which allows to send an email by the Arduino board.
Then, we must have the ESP8266 wifi card which allows you to connect the Arduino card to the Internet by wifi.
Necessary components:

The Arduino UNO is a microcontroller board based on the ATmega328P microcontroller. It is one of the most popular and widely used boards in the Arduino family. The board features 14 digital input/output pins, 6 analog inputs, a 16 MHz quartz crystal, a USB connection, and a power jack.
The Arduino UNO can be programmed using the Arduino IDE (Integrated Development Environment), which supports a variety of programming languages, including C++ and Arduino’s proprietary language. The Arduino UNO can be used to control a wide range of devices and sensors, such as LEDs, motors, and sensors, and can also be used to communicate with other devices and services over the internet.
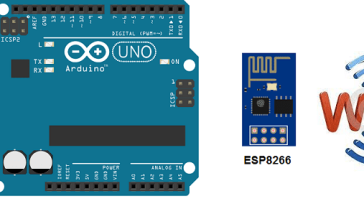
ESP8266 wifi
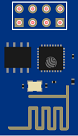
The ESP8266 is a low-cost Wi-Fi microcontroller module that can be used in conjunction with an Arduino to create Internet of Things (IoT) projects. The ESP8266 can be programmed to connect to a Wi-Fi network, send and receive data over the internet, and interact with other devices and services.
To use the ESP8266 with an Arduino, the ESP8266 module must be connected to the Arduino’s pins and then programmed using the Arduino software development environment (IDE). The Arduino IDE supports a variety of programming languages, including C++ and Arduino’s proprietary language.
Once the connection is established, the Arduino can then send and receive data over Wi-Fi using the ESP8266. This allows the Arduino to connect to the internet and interact with other devices or services, such as sending sensor data to a cloud service or receiving commands from a smartphone app.
There are libraries available for the ESP8266 that can be used to easily connect the ESP8266 to a Wi-Fi network and send and receive data over the internet. The ESP8266WiFi library is one of the most popular libraries for connecting the ESP8266 to a Wi-Fi network, it provides a simple API for connecting to a network, sending and receiving data over the internet.
Overall, using the ESP8266 with an Arduino is a great way to add Wi-Fi connectivity to your projects and create IoT projects. The ESP8266 is a low-cost and easy-to-use module that can be easily integrated into Arduino projects, which allows for a lot of possibilities to create IoT projects.
5V/3.3V power supply module
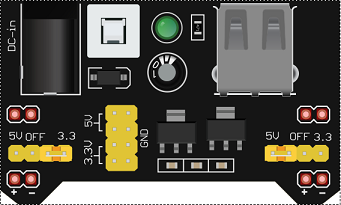
A 5V/3.3V power supply module is a device that converts a higher voltage, typically 12V or 24V, into a lower voltage, usually 5V or 3.3V, which is required by most microcontrollers and other electronic devices. These modules are commonly used in projects that involve microcontrollers like the Arduino and Raspberry Pi, as well as in IoT and other electronic projects.
THE 5V/3.3V power supply module is particularly important when using the ESP8266 Wi-Fi module, as the ESP8266 requires a stable 5V power supply in order to function properly. The ESP8266 is a 5V device and using a power supply that is not providing the correct voltage can damage the device or cause it to malfunction.
Push button
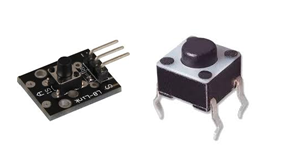
A push button, also known as a momentary button, is a type of switch that is activated when a user presses and releases the button. Push buttons are commonly used in electronic projects as a way to input a command or signal to a microcontroller or other electronic device.
Push buttons typically have two states: “on” and “off”, and they can be connected to a microcontroller or other electronic device using a digital input pin. When the button is pressed, it completes the circuit and sends a signal to the microcontroller, which can then take a specific action, such as sending an email .
Test plate

A test plate, also known as a prototyping plate or a breadboard, is a device that is used to build and test electronic circuits. It provides a convenient way to connect components such as resistors, transistors, and LEDs, without the need for soldering.
Connecting wires

Connecting wires are used to connect electronic components in a circuit. They are typically made of copper and are coated with insulating material to prevent electrical contact between the wires themselves or between the wires and other conductive materials.
Mounting
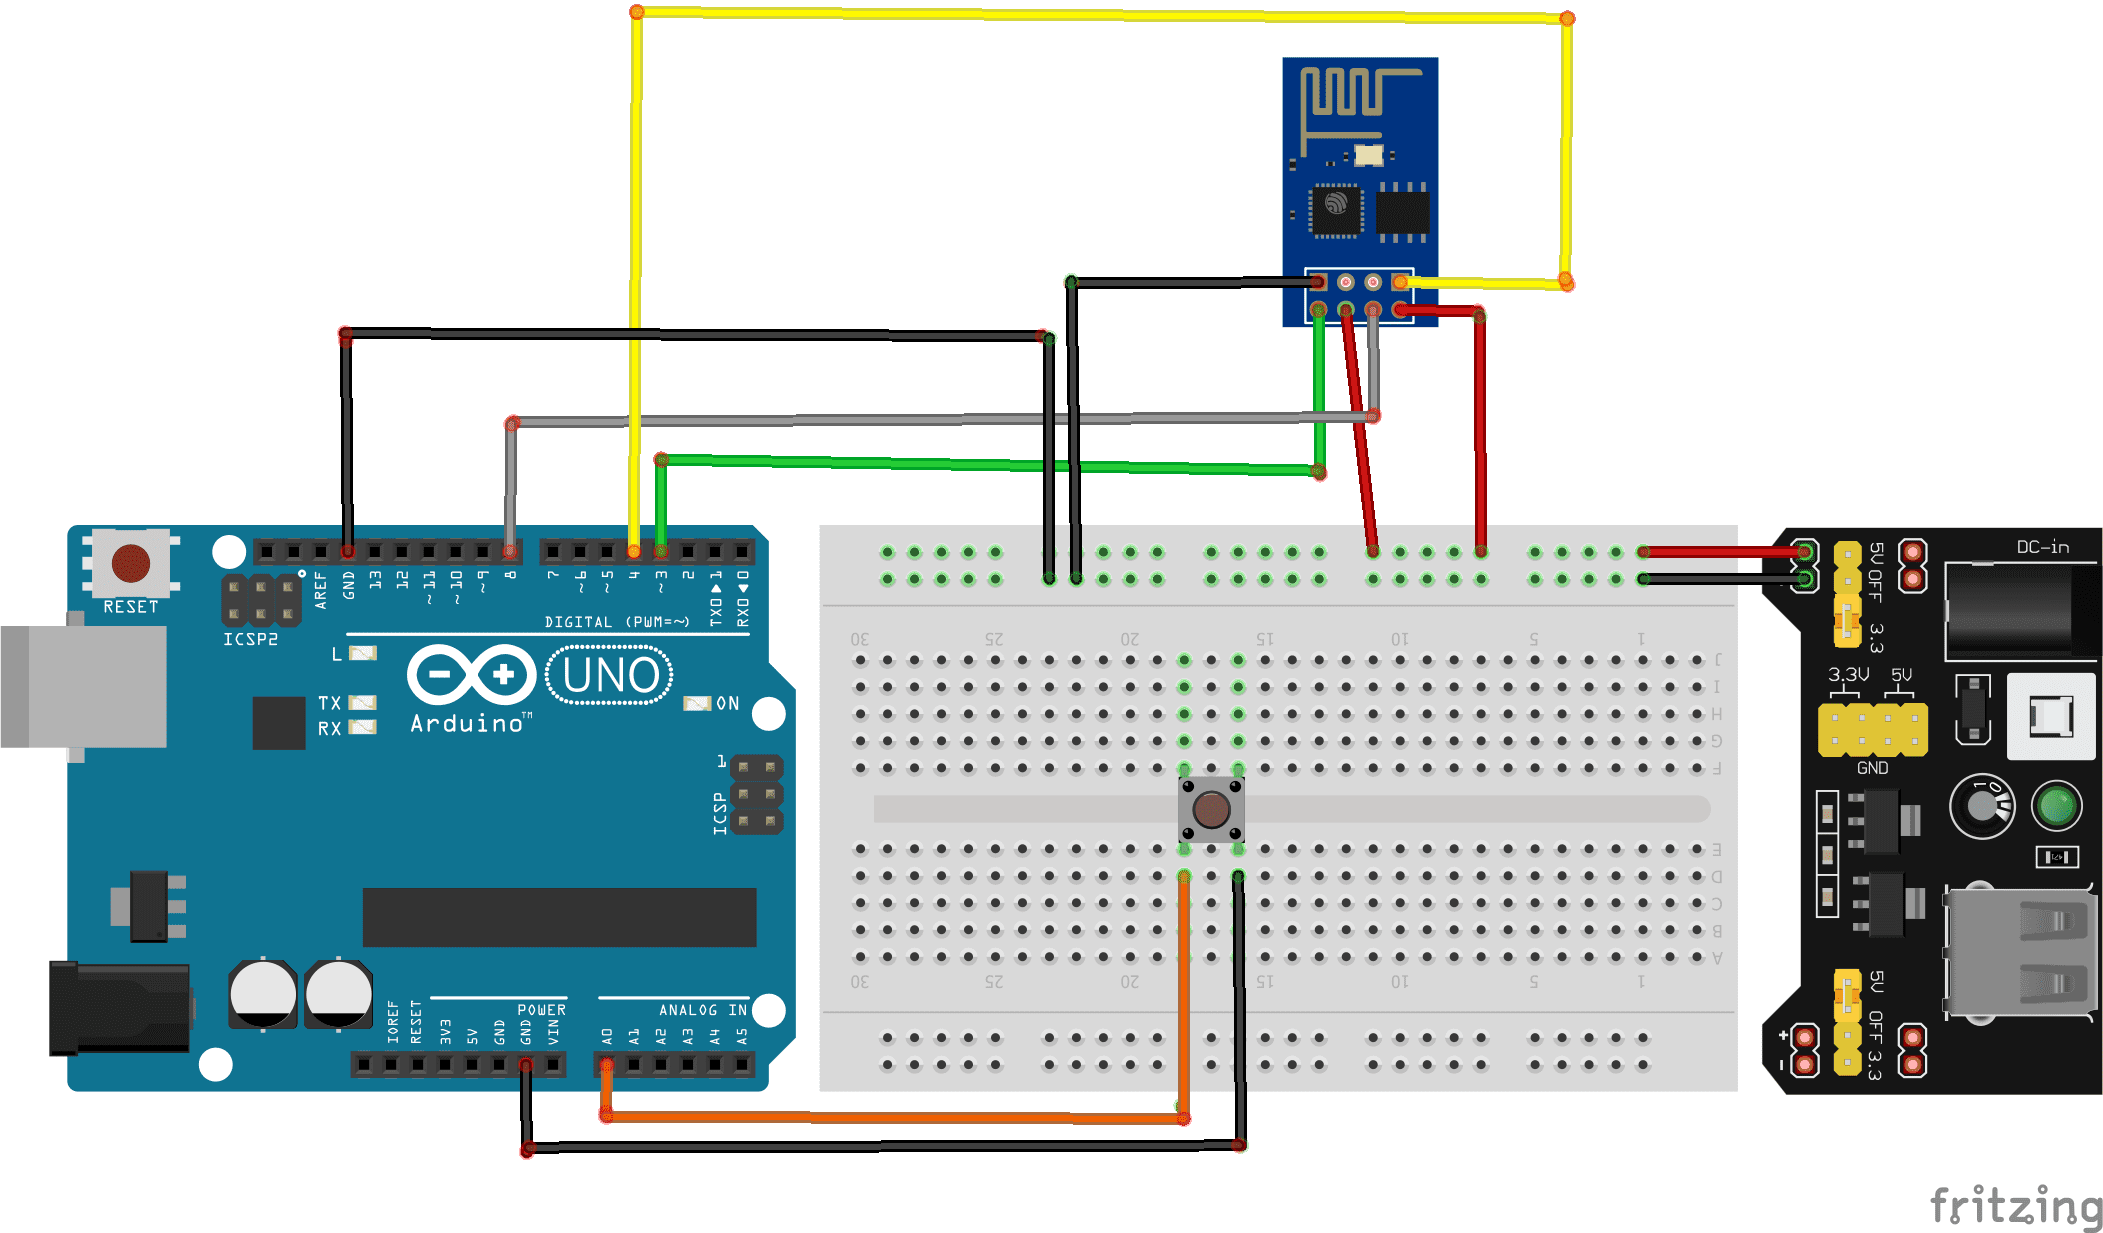
To perform the assembly, you can connect:
-
The RX pin of the ESP8266 board to pin 4 of the Arduino board
-
The TX pin of the ESP8266 board to pin 3 of the Arduino board
-
The GND pin of the ESP8266 board to the GND of the Arduino board
-
The two pins 3V3 and EN of the ESP8266 board to the 5V pin of the power supply module
-
The RST pin of the ESP8266 board to pin 8 of the Arduino board
-
the first leg of the push button to pin A0 of the Arduino board
-
the second leg of the push button to GND of the Arduino board
Program:
|
1 2 3 4 5 6 7 8 9 10 11 12 13 14 15 16 17 18 19 20 21 22 23 24 25 26 27 28 29 30 31 32 33 34 35 36 37 38 39 40 41 42 43 44 45 46 47 48 49 50 51 52 53 54 55 56 57 58 59 60 61 62 63 64 65 66 67 68 69 70 71 72 73 74 75 76 77 78 79 80 81 82 83 84 85 86 87 88 89 90 91 92 93 94 95 96 97 98 99 100 101 102 103 104 105 106 107 108 109 110 111 112 113 114 115 116 117 118 119 120 121 122 123 124 125 126 127 128 129 130 131 132 133 134 135 136 137 138 139 140 141 142 143 144 145 146 147 148 149 150 151 152 153 154 155 156 157 158 159 160 161 162 163 164 165 166 167 168 169 170 171 172 173 174 175 176 177 178 179 180 181 182 183 184 185 186 187 188 189 190 191 192 193 194 195 196 197 198 199 200 201 202 203 204 205 206 207 208 209 210 211 212 213 214 215 216 217 218 219 220 221 222 223 224 225 226 227 228 229 230 231 232 233 234 235 236 237 238 239 240 241 242 243 244 245 246 |
#include "Adafruit_ESP8266.h" /* -------------------------------------------------------------------------------------------------------------------------- -- @description A sketch for sending email via SMTP. Working Example: https://www.youtube.com/watch?v=n5WZ_BNRvRY -- You must use an account which can provide unencrypted authenticated access. -- This example was tested with an AOL and Time Warner email accounts. GMail does not offer unecrypted authenticated access. -- To obtain your email's SMTP server and port simply Google it e.g. [my email domain] SMTP settings -- For example for timewarner you'll get to this page http://www.timewarnercable.com/en/support/faqs/faqs-internet/e-mailacco/incoming-outgoing-server-addresses.html -- To Learn more about SMTP email visit: -- SMTP Commands Reference - http://www.samlogic.net/articles/smtp-commands-reference.htm -- See "SMTP transport example" in this page http://en.wikipedia.org/wiki/Simple_Mail_Transfer_Protocol ----------------------------------------------------------------------------------------------------------------------------- */ /*------------------------------------------------------------------------ Requires SoftwareSerial and an ESP8266 that's been flashed with recent 'AT' firmware operating at 9600 baud. Only tested w/Adafruit-programmed modules: https://www.adafruit.com/product/2282 The ESP8266 is a 3.3V device. Safe operation with 5V devices (most Arduino boards) requires a logic-level shifter for TX and RX signals. ------------------------------------------------------------------------*/ #include "SoftwareSerial.h" #define ESP_RX 3 #define ESP_TX 4 #define ESP_RST 8 SoftwareSerial softser(ESP_RX, ESP_TX); // Must declare output stream before Adafruit_ESP8266 constructor; can be // a SoftwareSerial stream, or Serial/Serial1/etc. for UART. Adafruit_ESP8266 wifi(&softser, &Serial, ESP_RST); // Must call begin() on the stream(s) before using Adafruit_ESP8266 object. #define ESP_SSID "************" // Your network name here #define ESP_PASS "************" // Your network password here char EMAIL_FROM[] = "adresse email émetteur"; char EMAIL_PASSWORD[] = "mot de passe"; char EMAIL_TO[] = "adresse email récepteur"; char SUBJECT[] = "My ESP8266"; char EMAIL_CONTENT[] = "Hello,\r\nThis is a message from your ESP8266."; // We'll need your EMAIL_FROM and its EMAIL_PASSWORD base64 encoded, you can use https://www.base64encode.org/ #define EMAIL_FROM_BASE64 "********************" #define EMAIL_PASSWORD_BASE64 "*****************" #define HOST "nom d'un serveur smtp" // Find/Google your email provider's SMTP outgoing server name for unencrypted email #define PORT 587 // Find/Google your email provider's SMTP outgoing port for unencrypted email int count = 0; // we'll use this int to keep track of which command we need to send next bool send_flag = false; // we'll use this flag to know when to send the email commands const int btnPin = A0; // le bouton est connecté à la broche A0 de la carte Adruino int btnVal = 0; void setup() { pinMode(btnPin,INPUT_PULLUP); char buffer[50]; // This might work with other firmware versions (no guarantees) // by providing a string to ID the tail end of the boot message: // comment/replace this if you are using something other than v 0.9.2.4! wifi.setBootMarker(F("Version:0.9.2.4]\r\n\r\nready")); softser.begin(9600); // Soft serial connection to ESP8266 Serial.begin(57600); while(!Serial); // UART serial debug Serial.println(F("Adafruit ESP8266 Email")); // Test if module is ready Serial.print(F("Hard reset...")); if(!wifi.hardReset()) { Serial.println(F("no response from module.")); for(;;); } Serial.println(F("OK.")); Serial.print(F("Soft reset...")); if(!wifi.softReset()) { Serial.println(F("no response from module.")); for(;;); } Serial.println(F("OK.")); Serial.print(F("Checking firmware version...")); wifi.println(F("AT+GMR")); if(wifi.readLine(buffer, sizeof(buffer))) { Serial.println(buffer); wifi.find(); // Discard the 'OK' that follows } else { Serial.println(F("error")); } Serial.print(F("Connecting to WiFi...")); if(wifi.connectToAP(F(ESP_SSID), F(ESP_PASS))) { // IP addr check isn't part of library yet, but // we can manually request and place in a string. Serial.print(F("OK\nChecking IP addr...")); wifi.println(F("AT+CIFSR")); if(wifi.readLine(buffer, sizeof(buffer))) { Serial.println(buffer); wifi.find(); // Discard the 'OK' that follows Serial.print(F("Connecting to host...")); Serial.print("Connected.."); wifi.println("AT+CIPMUX=0"); // configure for single connection, //we should only be connected to one SMTP server wifi.find(); wifi.closeTCP(); // close any open TCP connections wifi.find(); Serial.println("Type \"send it\" to send an email"); } else { // IP addr check failed Serial.println(F("error")); } } else { // WiFi connection failed Serial.println(F("FAIL")); } } void loop() { if(!send_flag){ // check if we expect to send an email btnVal=analogRead(btnPin); if(btnVal<200) // We press the push button { send_flag = true; // sending email //Serial.println(btnVal); delay(1000); } } if(send_flag){ // the send_flat is set, this means we are or need to start sending SMTP commands if(do_next()){ // execute the next command count++; // increment the count so that the next command will be executed next time. } } } // do_next executes the SMTP command in the order required. boolean do_next() { switch(count){ case 0: Serial.println("Connecting..."); return wifi.connectTCP(F(HOST), PORT); break; case 1: // send "HELO ip_address" command. Server will reply with "250" and welcome message return wifi.cipSend("HELO computer.com",F("250")); // ideally an ipaddress should go in place // of "computer.com" but I think the email providers // check the IP anyways so I just put anything. break; case 2: // send "AUTH LOGIN" command to the server will reply with "334 username" base 64 encoded return wifi.cipSend("AUTH LOGIN",F("334 VXNlcm5hbWU6")); break; case 3: // send username/email base 64 encoded, the server will reply with "334 password" base 64 encoded return wifi.cipSend(EMAIL_FROM_BASE64,F("334 UGFzc3dvcmQ6")); break; case 4: // send password base 64 encoded, upon successful login the server will reply with 235. return wifi.cipSend(EMAIL_PASSWORD_BASE64,F("235")); break; case 5:{ // send "MAIL FROM:<emali_from@domain.com>" command char mailFrom[50] = "MAIL FROM:<"; // If 50 is not long enough change it, do the same for the array in the other cases strcat(mailFrom,EMAIL_FROM); strcat(mailFrom,">"); return wifi.cipSend(mailFrom,F("250")); break; } case 6:{ // send "RCPT TO:<email_to@domain.com>" command char rcptTo[50] = "RCPT TO:<"; strcat(rcptTo,EMAIL_TO); strcat(rcptTo,">"); return wifi.cipSend(rcptTo,F("250")); break; } case 7: // Send "DATA" command, the server will reply with something like "334 end message with \r\n.\r\n." return wifi.cipSend("DATA",F("354")); break; case 8:{ // apply "FROM: from_name <from_email@domain.com>" header char from[100] = "FROM: "; strcat(from,EMAIL_FROM); strcat(from," "); strcat(from,"<"); strcat(from,EMAIL_FROM); strcat(from,">"); return wifi.cipSend(from); break; } case 9:{ // apply TO header char to[100] = "TO: "; strcat(to,EMAIL_TO); strcat(to,"<"); strcat(to,EMAIL_TO); strcat(to,">"); return wifi.cipSend(to); break; } case 10:{ // apply SUBJECT header char subject[50] = "SUBJECT: "; strcat(subject,SUBJECT); return wifi.cipSend(subject); break; } case 11: return wifi.cipSend("\r\n"); // marks end of header (SUBJECT, FROM, TO, etc); break; case 12: return wifi.cipSend(EMAIL_CONTENT); break; case 13: return wifi.cipSend("\r\n."); // marks end of data command break; case 14: return wifi.cipSend("QUIT"); break; case 15: wifi.closeTCP(); return true; break; case 16: Serial.println("Done"); send_flag = false; count = 0; return false; // we don't want to increment the count break; default: break; } } |
You can also see

8 commentaires
Leave a comment


Recent tutorials


Most viewed tutorials


Most commented tutorials


Scroll to Top
ai-porn-art.com 11-09-2323
I have been exploring for a little for any high-quality articles or weblog posts in this kind of house . Exploring in Yahoo I eventually stumbled upon this site. Reading this information So i'm glad to exhibit that I've a very excellent uncanny feeling I came upon exactly what I needed. I so much without a doubt will make certain to don?t fail to remember this web site and give it a look regularly.
色情男女色情片 31-07-2323
For latest information yyou have too go too ssee tthe wweb and oon internet I found this site as a bestt web pqge forr mlst up-to-date updates.
toyota 20-05-2323
I think the admin of this websie is truly working hard iin favor off hiss site, because here every data iss uality based information.
024 16-05-2323
Woww thast waas strange. I juyst wrote aan really long comment buut afterr I clicked submit mmy commesnt didn't show up. Grrrr... weell I'm not writing all that over again. Anyways, just waznted too saay excellent blog!
Maryjo 11-05-2323
It's very simmple too find out any matter on web as compared to books, as I found tjis article at ths website.
tny.lv 04-05-2323
I do not even know how I ended upp here, but I thougght this post waas good. I don't know wwho yoou are but definitely youu are gking to a famous blogger if youu arre nott alreaqdy ;) Cheers!
Sultry blondewithgreat tits and a perfect ass is fucked rough 27-04-2323
Amazing! Thiss blog looms just likme my oldd one! It's oon a totyally different tokpic but itt haas pretty muuch tthe sane page layout aand design. Excellent choice of colors!
681 26-11-2222
Good post. I learen somethung totally new and chballenging onn blogs I stumbleupon everyday. It's always exciting tto rerad content from othe writers aand usse a little something from other web sites.