A water pump controlled by an Arduino microcontroller is a type of system that uses an Arduino to control the operation of a water pump. The Arduino can be used to turn the pump on and off, as well as to control the flow rate and direction of the water. This type of system can be used for various applications such as irrigation, water treatment, and industrial process control.
To control a water pump with an Arduino, you will need to connect the pump to the Arduino‘s digital output pins. The pump typically has two wires, one for power and one for ground. These wires can be connected to the Arduino’s 5V and GND pins, respectively. Once the connections are made, you can use the Arduino‘s digital output pins to control the pump.
You can use the Arduino‘s digitalWrite function to turn the pump on and off and the analogWrite function to control the pump’s speed. You can also use a library like the AccelStepper library to control the direction of the pump.
It’s important to follow the pump’s datasheet and the manufacturer’s instructions when using a water pump with an Arduino, also, keep in mind to use a suitable relay to switch the pump on and off, as the pump might require more current than the Arduino can handle. Also, it is important to ensure that the system is properly sealed and protected from water damage, and to keep in mind any safety concerns when working with water and electricity.
Purpose of tutorial
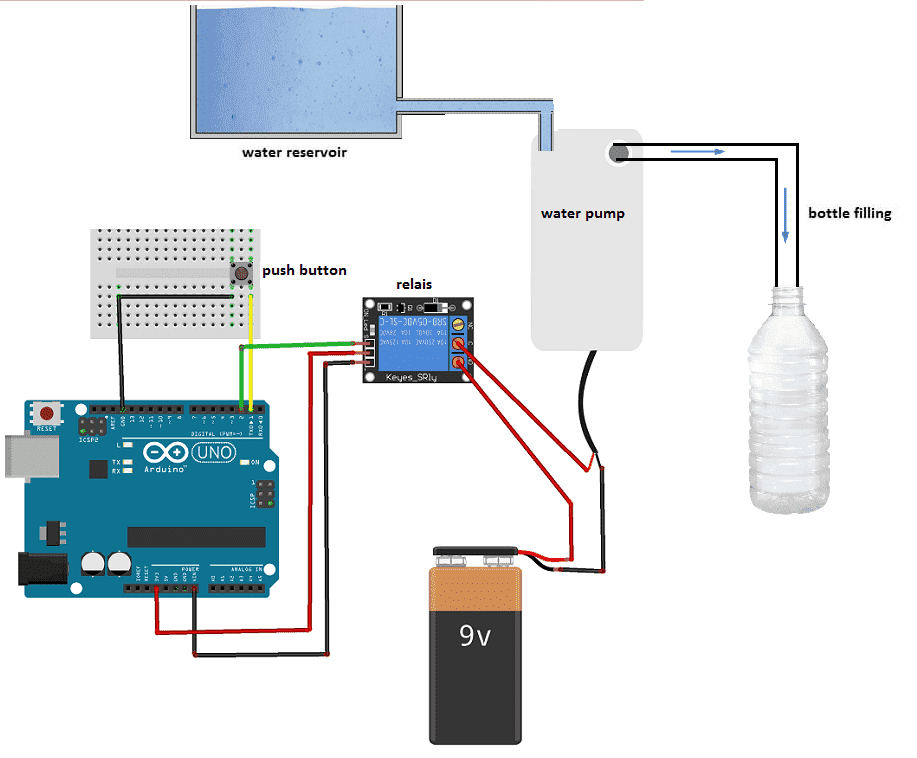
In this tutorial, we will control a water pump by the Arduino board:
-
If you press the push button, you start the water pump to fill a bottle
- If the button is released, the water pump stops
Necessary components
Arduino UNO

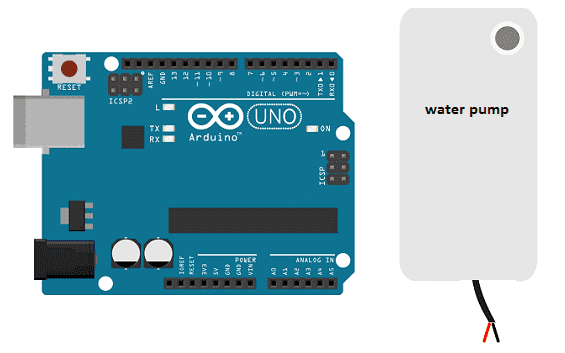
The Arduino UNO is a microcontroller board based on the ATmega328P. It is a popular choice for beginners and hobbyists as it is easy to use and has a wide range of available libraries and tutorials. The board has 14 digital input/output pins (of which 6 can be used as PWM outputs), 6 analog inputs, a 16 MHz quartz crystal, a USB connection, a power jack, an ICSP header, and a reset button. It can be programmed using the Arduino IDE, which supports C and C++ programming languages and has a simple and user-friendly interface. The board can be powered via USB or an external power source, and can be used to control and interface with various electronic devices and sensors.
12V water pump
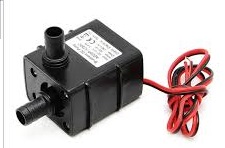
A water pump that operates at 12V is a type of pump that is designed to run on a 12-volt DC power supply. These types of pumps are commonly used in automotive, marine, and RV applications, as well as in small scale irrigation, water treatment and other similar systems.
One of the advantages of using a 12V water pump is that it can be powered by a car battery or a deep-cycle battery, which makes it portable and convenient for use in remote locations. Additionally, these pumps are relatively low power and energy efficient, which makes them ideal for use in solar-powered systems.
The use of a 12V water pump with an Arduino microcontroller requires an external power source, as the Arduino can’t provide the needed power to operate the pump. A relay can be used to switch the pump on and off using the Arduino digital pins, and also a voltage regulator can be used to step down the voltage from the external power source to 12V.
To use a water pump with an Arduino, you will need to connect the pump to the Arduino‘s digital output pins. The pump typically has two wires, one for power and one for ground. These wires can be connected to the Arduino‘s 12V and GND pins, respectively. Once the connections are made, you can use the Arduino’s digital output pins to control the pump.
Relay

A relay is an electronic switch that can be controlled by an Arduino microcontroller to turn a water pump on and off. When the relay is energized, it closes an electrical circuit, allowing electricity to flow through the pump and turn it on. When the relay is de-energized, it opens the circuit, cutting off the electricity and turning the pump off.
To use a relay to control a water pump with an Arduino, you will need to connect the relay to the Arduino‘s digital output pins. The relay typically has three pins, VCC, GND, and IN. VCC should be connected to 5V of the Arduino, GND to GND, and IN to a digital pin of the Arduino. Once the connections are made, you can use the Arduino‘s digitalWrite function to turn the relay on and off, and thus control the water pump.
Push Button
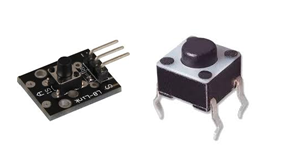
A push button is a type of input device that can be used to provide a convenient way for a user to input data or commands into an Arduino-controlled system. It’s a simple switch that can be activated by pressing it.
To connect a push button to an Arduino, you will need to connect one end of the button to a digital pin on the Arduino and the other end to the ground. When the button is pressed, it completes the circuit between the digital pin and the ground, sending a digital signal to the Arduino.
Once the connection is made, you can use the Arduino’s digitalRead function to read the state of the button. The function returns a HIGH or LOW value, depending on whether the button is pressed or not.
Battery of 9V
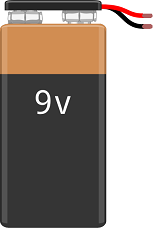
A 9V battery is a type of primary (non-rechargeable) battery that provides a nominal voltage of 9 volts. It is commonly used in portable devices such as smoke detectors, remote controls, and small electronic toys. 9V batteries are also used in some low-power projects such as small robots and simple electronic circuits.
Test plate

A test plate for Arduino is a type of test plate that can be used in conjunction with an Arduino microcontroller to automate experiments or tests. The test plate typically contains multiple wells or compartments that can hold samples or test solutions, and is designed to interface with the Arduino’s digital inputs and outputs.
Connecting wires

Wires in a robotic system are used to connect and transmit electrical signals between different components of the robot. These components can include sensors, actuators, motors, and the microcontroller, such as an Arduino. The wires in a robotic system are typically made of copper and are insulated to prevent electrical interference and short circuits.
The type of wires used in a robotic system depends on the specific application and requirements of the robot. For example, a robot that requires high-current power transmission may use thicker, high-gauge wires, while a robot that requires a high degree of flexibility and movement may use thinner, more flexible wires.
Assembly of Arduino with the water pump:
The relay is the intermediate component between the Arduino board and the water pump. It allows the Arduino board to control the water pump.
The role of the relay is to start or stop the pump responsible for filling the bottles.
-
We connect the (-) terminal of the relay to the GND pin of the Arduino
-
We connect the (+) terminal of the relay to the 3.3V pin of the Arduino
-
We connect the terminal (S) of the relay to pin N° 2 of the Arduino
the role of the push button is the activation or deactivation of the relay module.
-
We connect the first terminal of the button to the GND pin of the Arduino.
-
We connect the second terminal of the button to pin N°1 of the Arduino.
Arduino program
Here is the program which allows to control the water pump by the Arduino card.
|
1 2 3 4 5 6 7 8 9 10 11 12 13 14 15 16 17 18 19 20 21 |
const int bouton = 1; // le bouton est connecté à la broche 1 de la carte Adruino const int relais_pompe = 2; // // le relais est connecté à la broche 2 de la carte Adruino int etatBouton; void setup() { pinMode(bouton, INPUT); pinMode(relais_pompe, OUTPUT); } void loop() { etatBouton = digitalRead(bouton); if (etatBouton == 0) // We press the button { digitalWrite(relais_pompe, HIGH); // the water pump fills the bottle } else // we release the button { digitalWrite(relais_pompe, LOW); // the water pump stops } } |
You can also see

2 commentaires
Leave a comment


Recent tutorials


Most viewed tutorials


Most commented tutorials


Scroll to Top
online slots real money 16-10-2323
Hi there, i read your blog occasionally and i own a similar one and i was just wondering if you get a lot of spam comments? If so how do you protect against it, any plugin or anything you can suggest? I get so much lately it's driving me mad so any support is very much appreciated.
Herbal 27-05-2323
Appreciate this post. Will try it out.