Presentation of automatic watering system
An automatic watering system is a system designed to automatically water plants or crops without human intervention. It is typically used in agricultural settings, but can also be used in residential gardens, greenhouses, and other settings where plants need to be watered regularly.
There are several different types of automatic watering systems available, including drip irrigation systems, sprinkler systems, and soaker hose systems. Each system has its own advantages and disadvantages, and the type of system that is best for a particular situation will depend on factors such as the type of plants being watered, the size of the area that needs to be watered, and the availability of water.
Drip irrigation systems are one of the most popular types of automatic watering systems. They work by delivering water directly to the roots of plants, which helps to conserve water and prevent evaporation. Sprinkler systems are another popular option, and they work by spraying water over a large area, similar to how rainfall would naturally water plants. Soaker hose systems work by slowly releasing water from a porous hose, which allows the water to seep into the soil around the plants.
Many automatic watering systems can be controlled using a timer, which allows the system to be set to water at specific times of the day or week. Some systems can even be controlled remotely, using a smartphone or other device. This makes it easy to ensure that plants are getting the water they need, even when the user is away from home.
An automatic watering system with Arduino is a DIY project that involves using an Arduino microcontroller board to control a watering system. The Arduino board is programmed to turn on and off a water pump or valve, based on data from sensors such as soil moisture sensors, temperature sensors, or humidity sensors. The system can be set up to water plants at specific times of the day or when the soil moisture levels drop below a certain threshold.
Here are the basic steps to create an automatic watering system with Arduino:
- Gather materials: You will need an Arduino board, a water pump or valve, sensors (such as soil moisture sensors or temperature sensors), tubing or piping, and a power supply.
- Connect the components: Follow the wiring diagram to connect the Arduino board to the water pump or valve, sensors, and power supply.
- Write the code: Use the Arduino software to write the code that will control the watering system. The code should include instructions for reading data from the sensors and turning on or off the water pump or valve based on that data.
- Test the system: Once the code is written, test the system to make sure it works as expected. Use a container of water and the sensors to simulate a watering scenario.
- Install the system: Once the system has been tested and is working properly, install it in the location where it will be used (such as a garden or greenhouse).
With an automatic watering system with Arduino, it is possible to create a customized and efficient watering system that can save time, water, and money.
Purpose of this project:
This project consists of creating an automatic watering system for plants, which triggers a water supply only in case of need. Suitable for a single plant or a small plantation, this system can be replicated at different scales. It will allow you to maintain your plants in your absence, or to manage the growth of species particularly sensitive to moisture by setting fine adjustments.
This automatic watering device will provide an opportunity to study the use of an analog signal from a sensor to activate a fairly powerful actuator (here an electric pump) using a relay.
Principle of operation:
Located near the plant or plants to be monitored, the installation monitors the state of drought of the earth with the help of a dedicated sensor, characterizing the resistance of the earth between two electrodes. This information is then used to activate a 5V pump, driven by an Arduino board to supply plants with water.
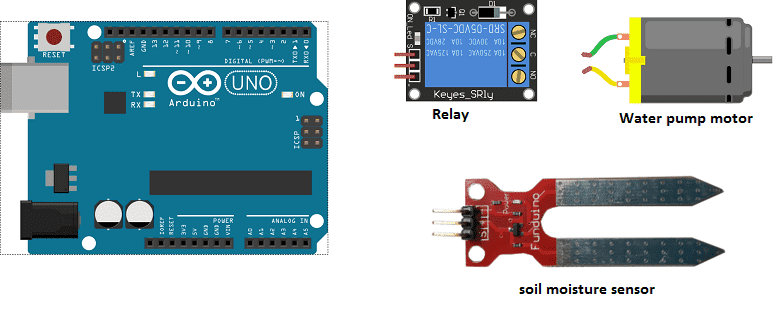
Composants nécessaires
Arduino UNO

Arduino UNO is a popular microcontroller board based on the ATmega328P microcontroller. It is designed for prototyping and experimenting with electronics and is widely used by hobbyists, students, and professionals alike.
The board has 14 digital input/output pins, 6 analog input pins, a 16 MHz quartz crystal, a USB connection, a power jack, and a reset button. It can be powered through the USB connection or an external power supply.
The digital pins can be used for input or output and can provide a maximum of 40 mA of current. The analog pins can be used to read voltage values from sensors or other analog devices.
The Arduino UNO can be programmed using the Arduino Integrated Development Environment (IDE), which is a free software tool that allows users to write, compile, and upload code to the board. The IDE uses a simplified version of the C++ programming language, and there are many libraries and examples available online to help users get started with programming the board.
Soil moisture sensor
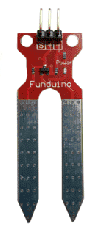
A soil moisture sensor is a device that measures the amount of water in the soil. These sensors typically work by measuring the electrical conductivity of the soil, which changes as the soil becomes wetter or drier. The sensors can be used in a variety of applications such as agriculture, gardening, and landscaping to help optimize irrigation and water usage.
There are different types of soil moisture sensors available, such as capacitive sensors, resistance sensors, and time domain reflectometry (TDR) sensors. Capacitive sensors measure the dielectric constant of the soil, which changes with the amount of water in the soil. Resistance sensors measure the resistance of the soil, which also changes with the amount of water in the soil. TDR sensors measure the time it takes for a pulse of energy to travel through the soil and return, and use that information to calculate the soil moisture content.
A soil moisture sensor can be connected to a Micro:bit, and the microcontroller can be programmed to read the sensor’s output and determine the moisture level of the soil. This information can then be used to control the valves of an automatic sprinkler system, for example, to turn on or off the water flow.
5V water pump
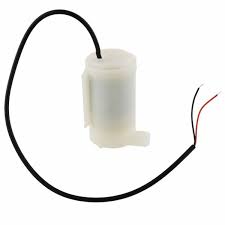
A 5V water pump is an electrically powered pump that runs on a 5V DC power supply. These pumps are designed to move water or other liquids and are often used in a variety of applications such as aquariums, hydroponics, cooling systems, and small-scale irrigation. They can be controlled by a switch or a microcontroller, and can be powered by a variety of sources such as batteries, USB ports or wall adapters. Some examples of 5V water pumps include submersible pumps, centrifugal pumps and diaphragm pumps.
relay

A relay is an electronic switch that is controlled by a low-voltage input signal and is used to turn the water pump on and off. It typically consists of an electromagnet, a switch, and a set of contacts. The electromagnet is activated by the low-voltage input signal, which causes the switch to close or open the contacts, allowing or cutting off power to the water pump. This allows for the water pump to be controlled remotely or by a microcontroller.
water tank

A water tank in a sprinkler system is a container that holds a supply of water that is used to supply the sprinklers. It can be used to store and pressurize the water that is used in the irrigation system. The water tank can be a part of the sprinkler system and can also be used as a backup water supply in case of a power outage or pump failure. The water tank can be made of various materials like plastic, metal or concrete. The size and capacity of the water tank will depend on the size of the irrigation system and the amount of water needed to be stored. The water tank is typically located underground or at ground level and can be connected to the pump and other components of the irrigation system.
connecting wires

Connecting wires are used to connect various components in an electronic circuit. They allow for the transfer of electricity, data, or signals between different devices and components.
When connecting wires to an Arduino or other microcontroller, it is important to pay attention to the correct pinout. The pinout refers to the arrangement of pins on the microcontroller and the corresponding function of each pin. The Arduino pinout can be found in the documentation provided by the manufacturer, or in various resources available online.
test plate

A test plate, also known as a test jig, is a device used to test electronic circuits and components. It is a board or plate that has been designed to hold and connect various components and devices in a specific configuration, allowing for the easy testing and measurement of their performance.
A test plate can be used to test various types of electronic circuits and components, such as microcontrollers, sensors, and actuators. It typically includes connectors and sockets for connecting wires, power supply and measurement devices such as multimeters, oscilloscopes, and power supplies.
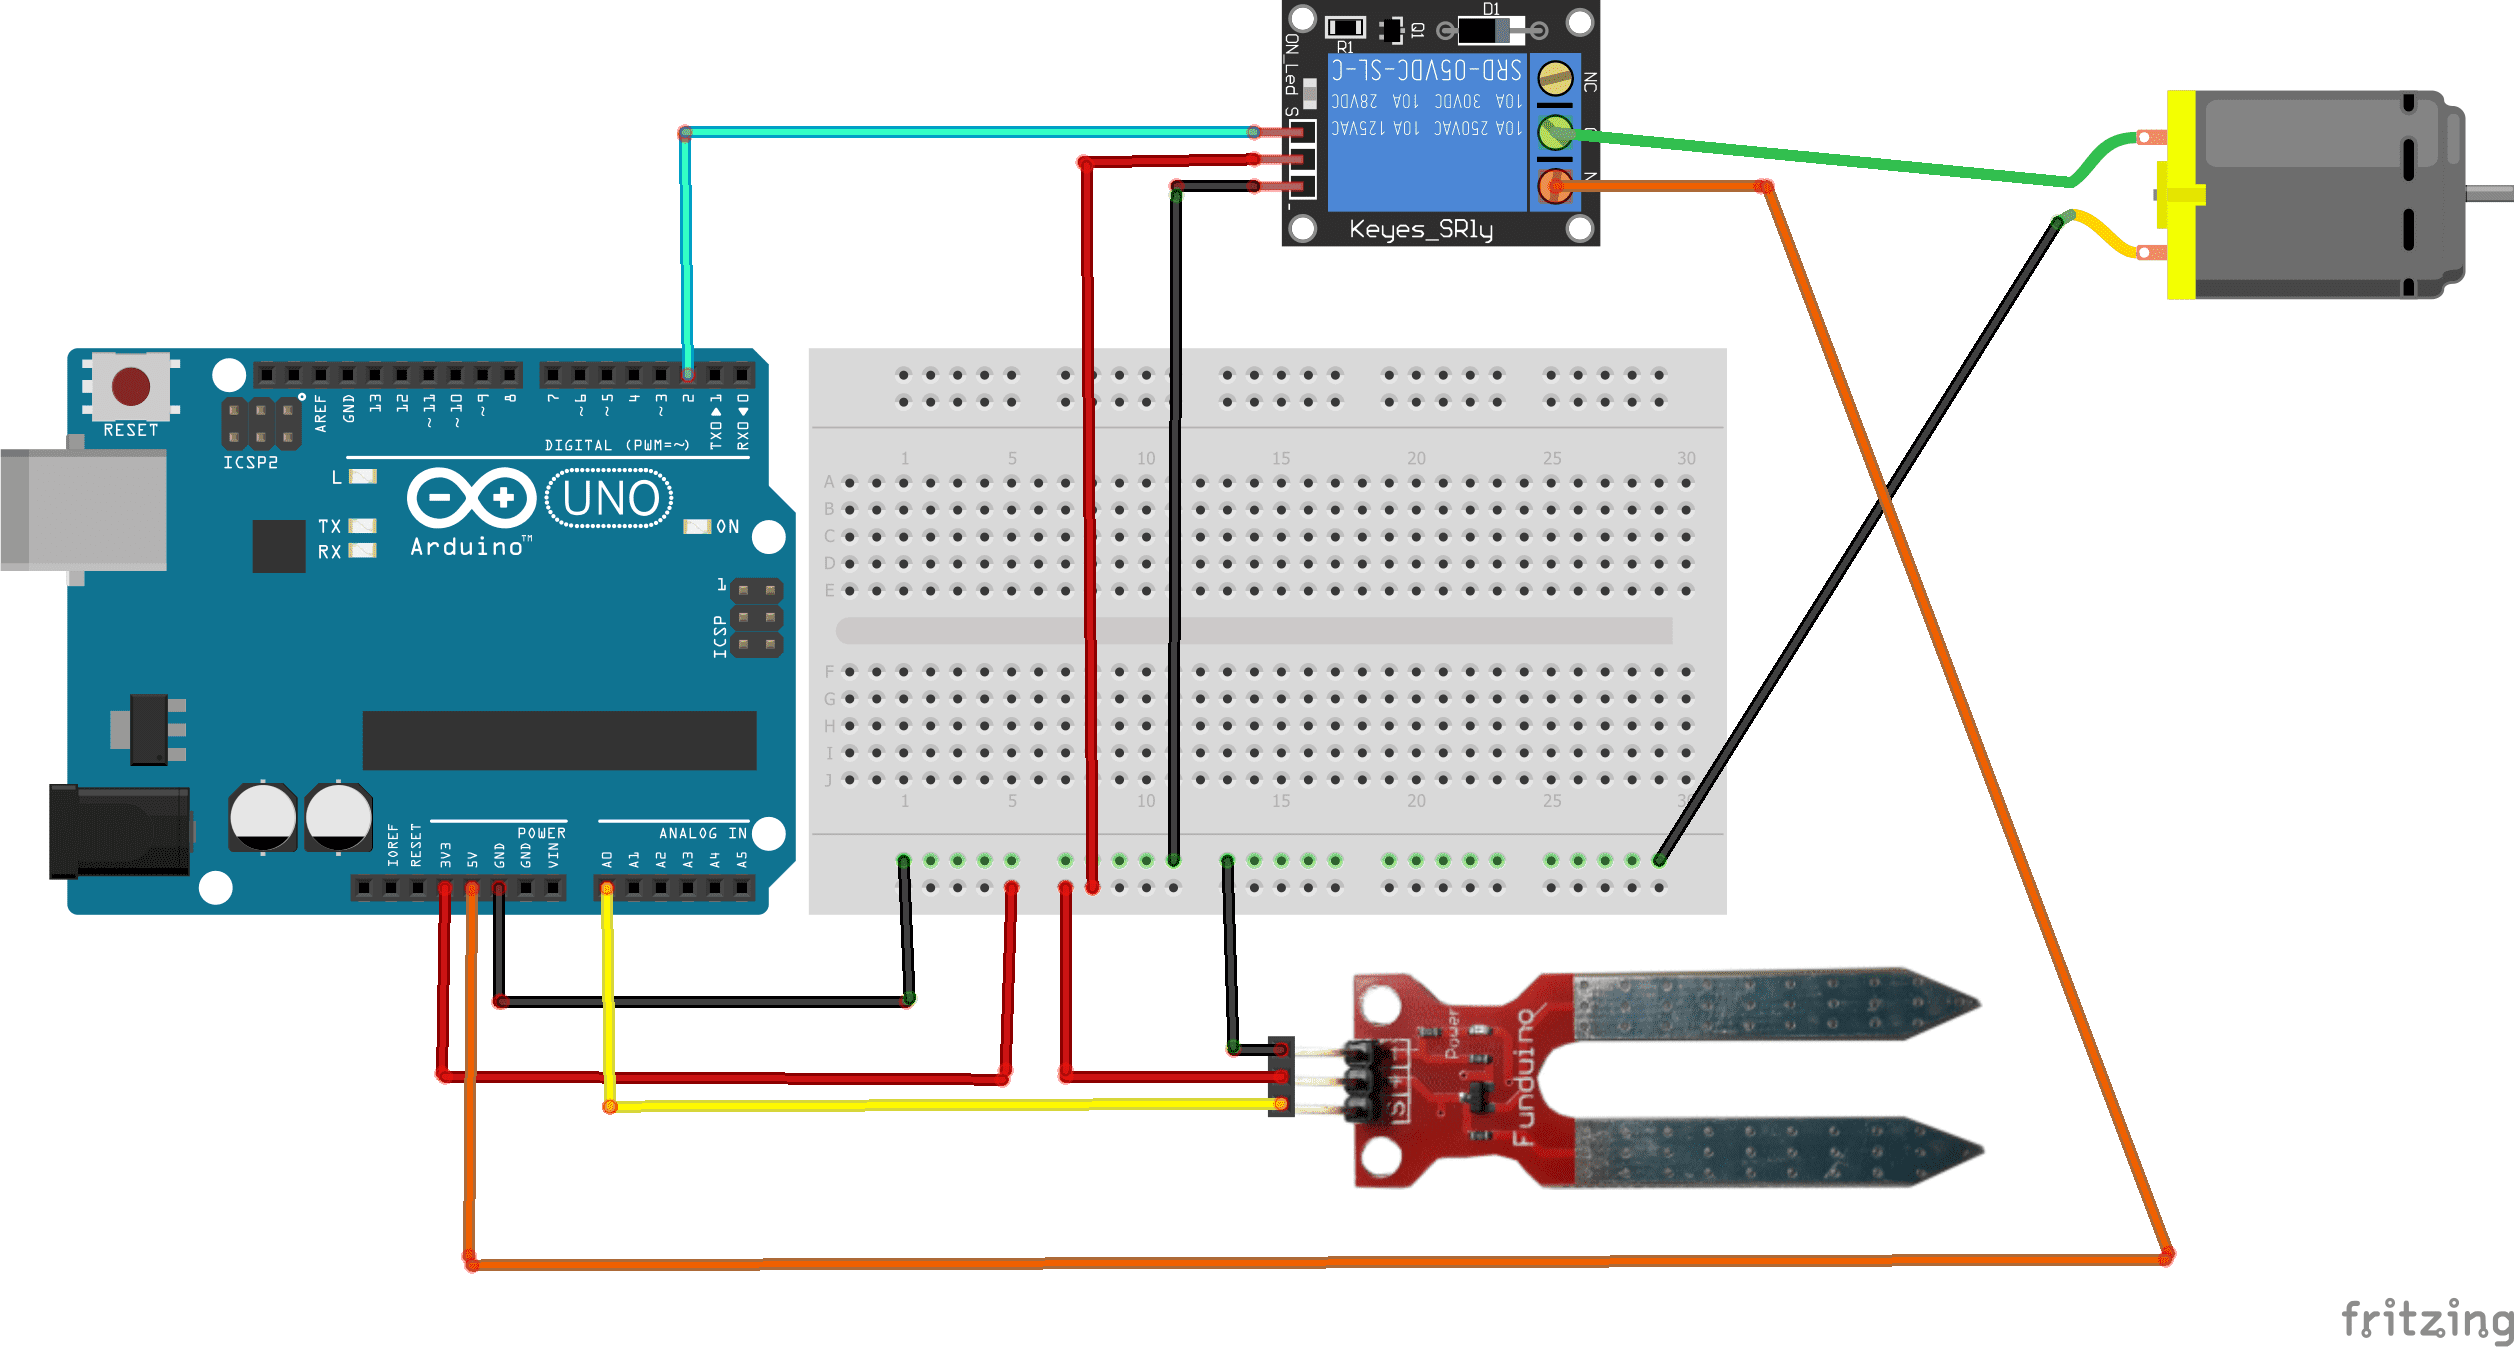
Mounting the automatic watering system
To make the assembly, we can connect
For the soil moisture sensor:
- pin (+) to 3.3V pin of Arduino
- pin (-) to GND pin of Arduino
- pin (S) to pin A0 of Arduino
For relay :
- pin (+) to 3.3V pin of Arduino
- pin (-) to GND pin of Arduino
- pin (S) to pin 4 of Arduino
- pin (ON) to 5V pin of Arduino
For the water pump:
- the first terminal to the COM pin of the relay
- the second GND terminal to Arduino GND pin
Program
Here is the program for the Arduino board connected to the automated parking system.
|
1 2 3 4 5 6 7 8 9 10 11 12 13 14 15 16 17 18 19 20 21 |
int digitalPin = 4; // For relay int analogPin = A0; // For the soil moisture sensor int digitalVal; // digital readings int analogVal; //analog readings void setup() { pinMode(digitalPin, OUTPUT); digitalWrite(digitalPin, LOW); } void loop() { analogVal = analogRead(analogPin);//read the value returned by the moisture sensor if (analogVal<400){//if the humidity sensor returns a value<500 digitalWrite(digitalPin, HIGH);//The water pump waters the plant } else { // sinon digitalWrite(digitalPin, LOW);//Water pump stops watering } delay(100); } |
You can also see

12 commentaires
Leave a comment


Recent tutorials


Most viewed tutorials


Most commented tutorials


Scroll to Top
Warehouse painting contractors in Cincinnati 18-10-2323
Unquestionably believe that which you stated. Your favorite reason seemed to be on the internet the simplest thing to be aware of. I say to you, I definitely get irked while people think about worries that they plainly don't know about. You managed to hit the nail upon the top and defined out the whole thing without having side effect , people could take a signal. Will likely be back to get more. Thanks
model pagar beton terbaru 16-09-2323
Greetings! This is my first visit to your blog! We are a collection of volunteers and starting a new initiative in a community in the same niche. Your blog provided us valuable information to work on. You have done a marvellous job!
เว็บตรง สล็อต ฝากถอน ไม่มีขั้นต่ำ 1 บาทก็ ถอนได้ 27-08-2323
Hi there! Do you use Twitter? I'd like to follow you if that would be okay. I'm definitely enjoying your blog and look forward to new updates.
เว็บสล็อตเปิดใหม่ล่าสุด สมัครสมาชิกฟรี 08-08-2323
There is definately a lot to find out about this subject. I love all of the points you made.
special 03-12-2222
You actually make it seem so easy with your presentation but I find this topic to be really something that I think I would never understand. It seems too complicated and extremely broad for me. I am looking forward for your next post, I will try to get the hang of it!
tracfone coupon 29-11-2222
It's perfect time to make some plans for the longer term and it's time to be happy. I've read this post and if I could I desire to suggest you some attention-grabbing things or suggestions. Perhaps you can write next articles regarding this article. I desire to learn even more issues approximately it!
Krungle 24-08-2222
yeaaa fantastic robot
Phoebe 17-07-2222
Hey I know this is off topic but I was wondering if you knew of any widgets I could add to my blog that automatically tweet my newest twitter updates. I've been looking for a plug-in like this for quite some time and was hoping maybe you would have some experience with something like this. Please let me know if you run into anything. I truly enjoy reading your blog and I look forward to your new updates.
Ricky 17-07-2222
What's up, just wanted to say, I liked this post. It was helpful. Keep on posting!
Etsuko 17-07-2222
This information is worth everyone's attention. How can I find out more?
Star 07-07-2222
Excellent web site you have got here.. It's hard to find good quality writing like yours these days. I truly appreciate people like you! Take care!!
David 10-12-2121
Hello bro, i want to make color detector with a phone and a arduino for detect color of coffee beans, it is possible?