A cooling system is a mechanism or machine designed to lower the temperature of a substance or system. Cooling systems are used in a variety of applications, including refrigeration, air conditioning, and industrial processes. They can be powered by electricity, gasoline, or other energy sources, and can use a variety of cooling methods, such as air cooling, water cooling, or liquid refrigerant cooling. The specific design and operation of a cooling system will depend on the application for which it is used.
An Arduino can be used to control a cooling system by monitoring temperature sensors and activating cooling devices such as fans or refrigeration units when the temperature exceeds a certain threshold. The Arduino can also be programmed to adjust the cooling based on other factors such as humidity or time of day. To control the cooling system with an Arduino, you will need to connect temperature sensors and cooling devices to the Arduino‘s digital or analog inputs and outputs, and write a program using the Arduino programming language (based on C++) to control the system according to your desired temperature and other settings.
Purpose of this project:
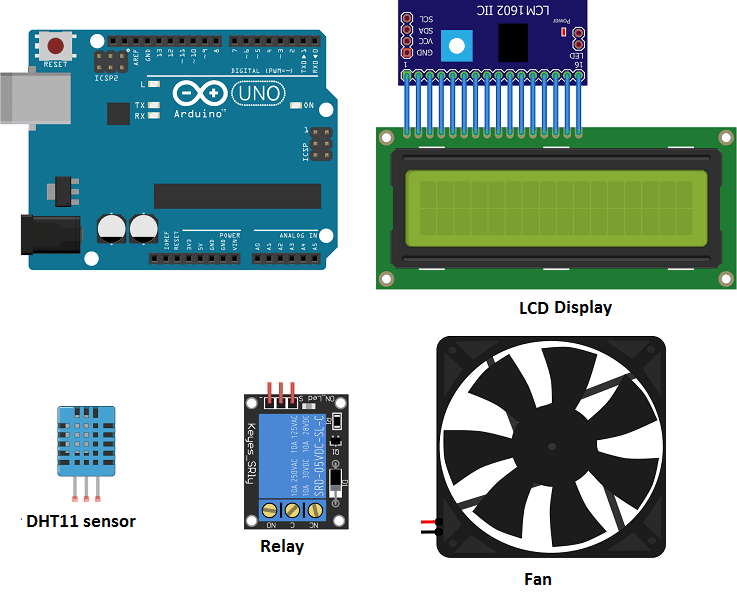
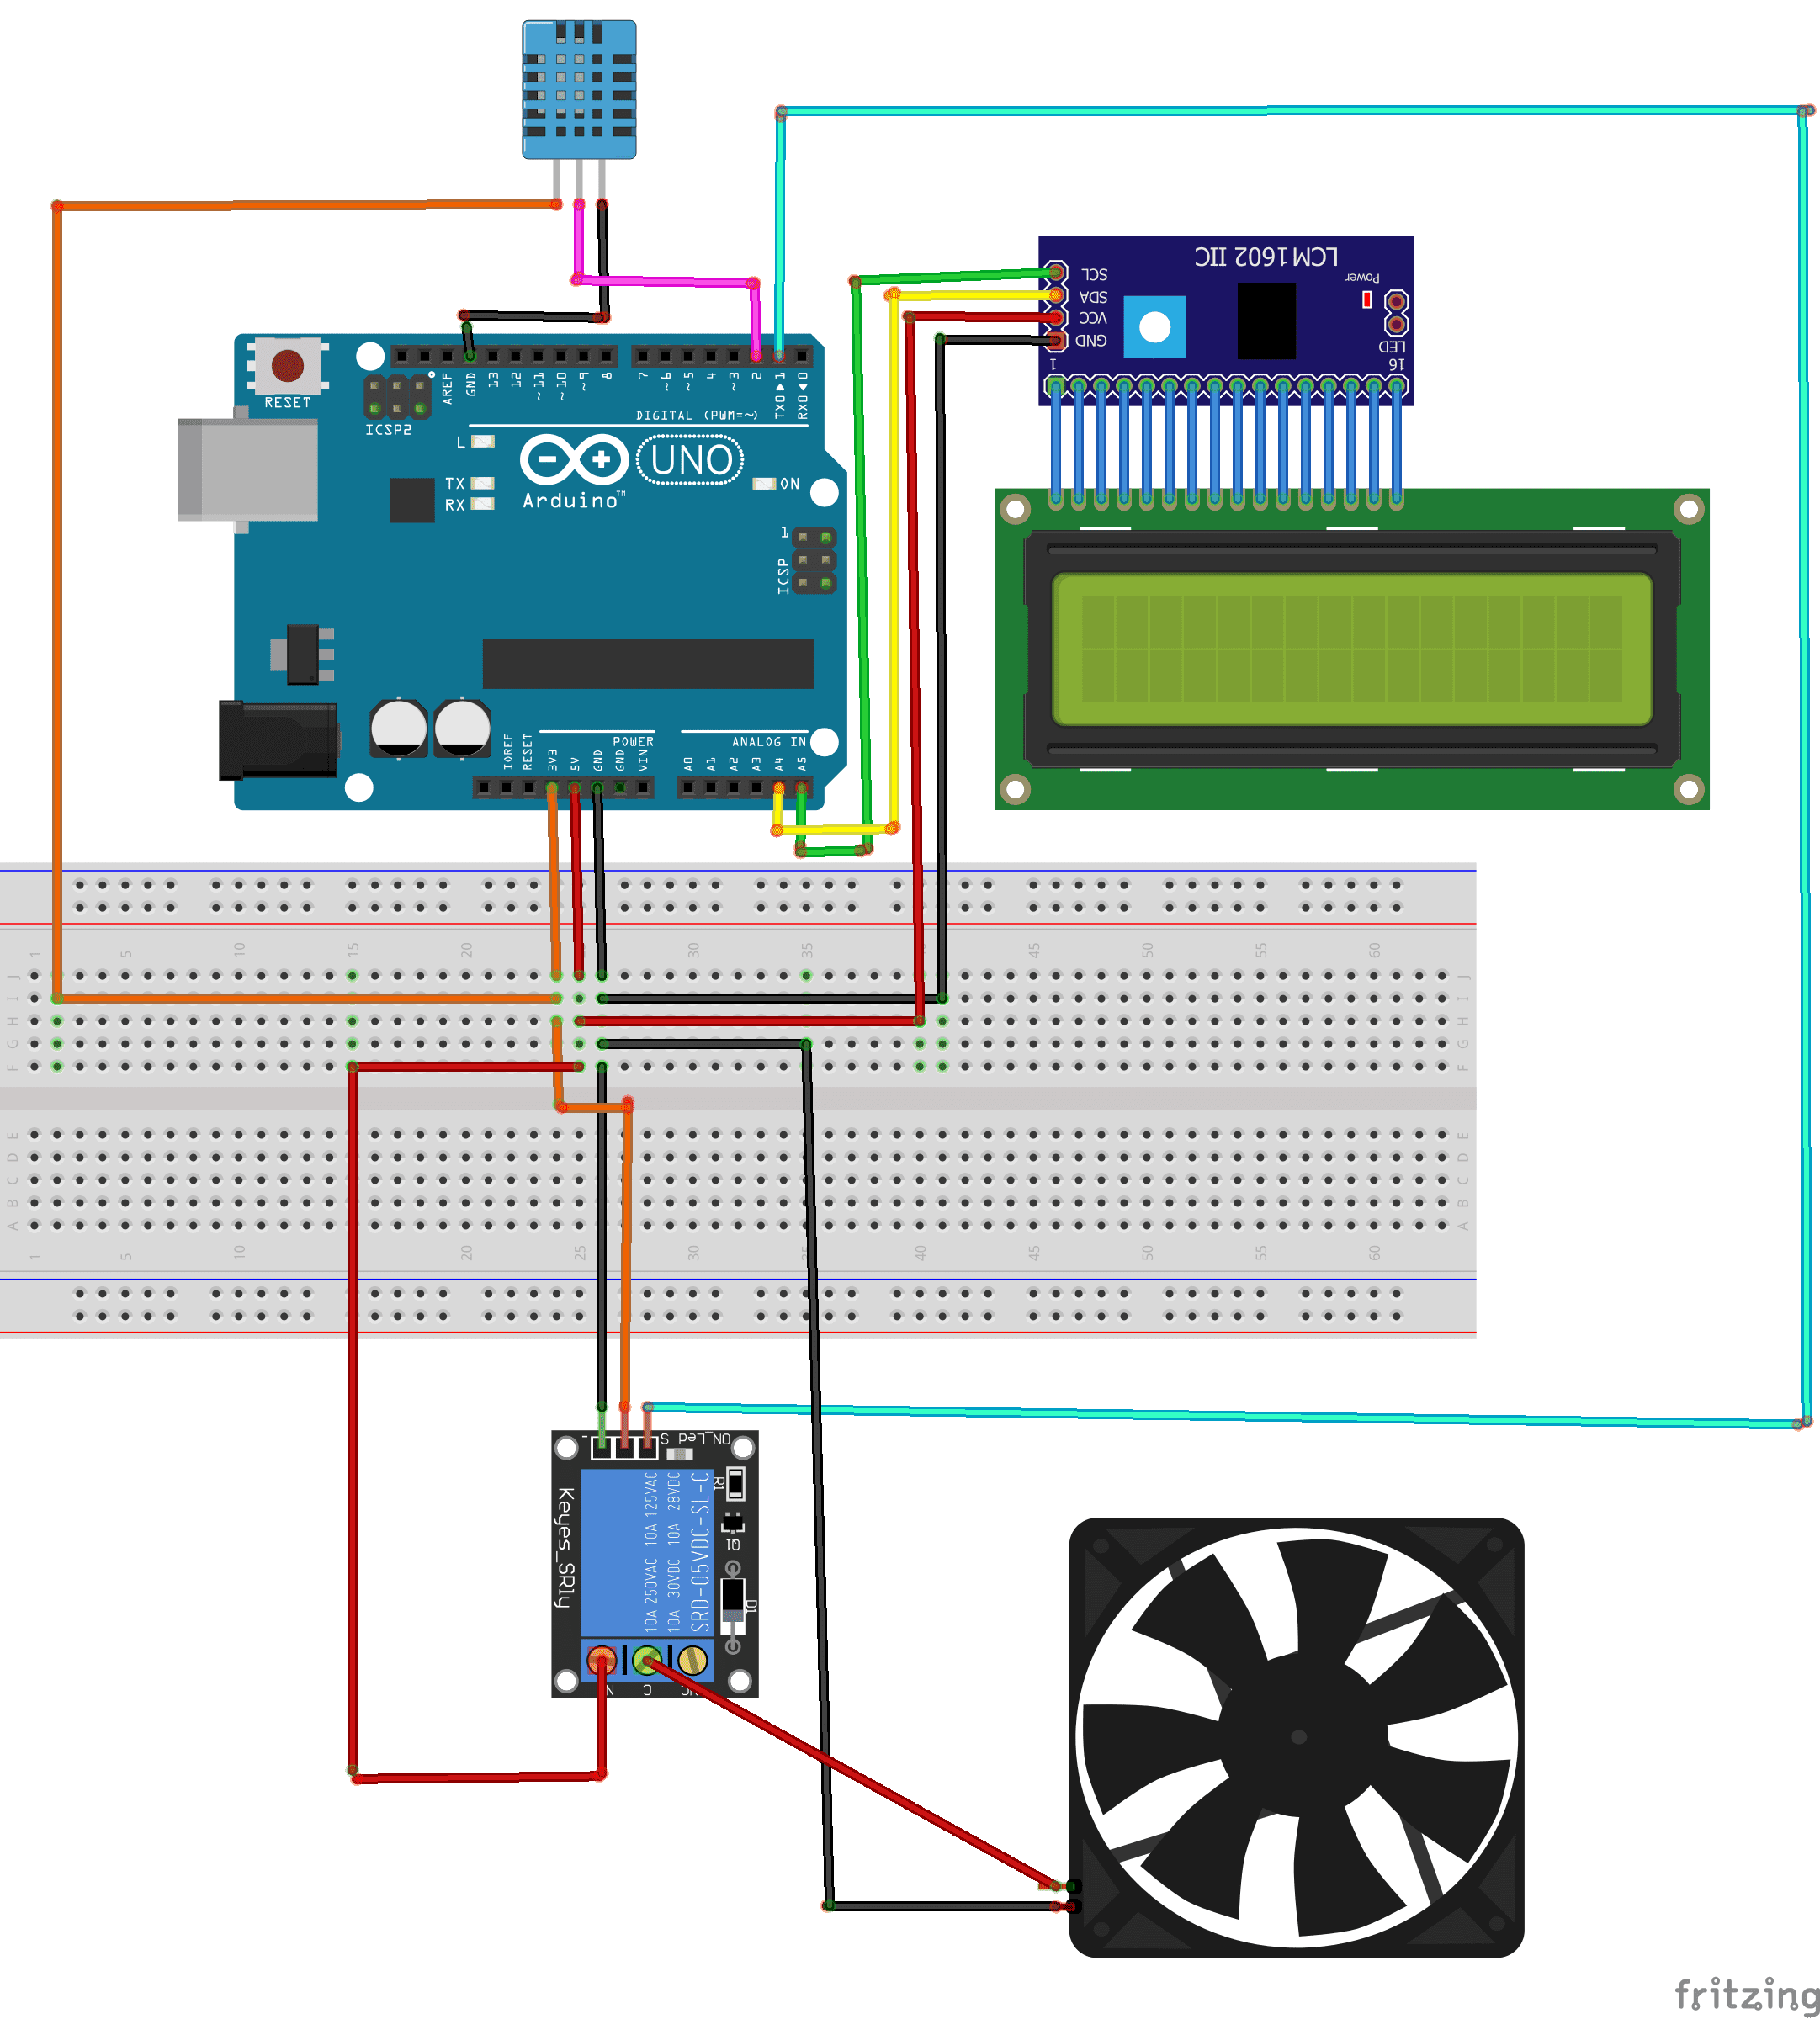
In this project a cooling system will be built with Arduino. It mainly uses a DTH11 temperature sensor, fan and LCD display.
When the Arduino board detects a temperature > 28°C the fan starts to rotate until the temperature becomes < 28°C.
Necessary components
Arduino UNO

The Arduino UNO is a microcontroller board based on the ATmega328P. It has 14 digital input/output pins, 6 analog inputs, a 16 MHz quartz crystal, a USB connection, a power jack, an ICSP header, and a reset button. It is the most popular and widely used board among the Arduino boards.
The Arduino UNO can be programmed using the Arduino programming language, which is based on C++. It uses a simple and intuitive programming environment, making it easy for beginners to get started with microcontroller programming.
The Arduino UNO can be connected to various sensors and actuators to control different devices and perform different tasks. For example, it can be used to control motors, read data from sensors, display information on an LCD screen, and communicate with other devices via serial communication protocols such as I2C and SPI.
The Arduino UNO can also be powered by a USB cable or an external power supply, making it easy to use in a wide range of projects and applications. It’s compatible with a wide range of shields (expansion boards) that adds functionality to the board, such as Ethernet, WiFi, and Bluetooth, and it’s widely supported by a strong and active community, which provides a lot of tutorials, examples and libraries to help users to get the most of the board.
LCD I2C 160A display
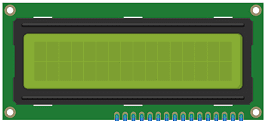
An LCD I2C 160A display is a type of liquid crystal display (LCD) that uses the Inter-Integrated Circuit (I2C) protocol to communicate with the controller or host device. The “160A” in the name likely refers to the display’s dimensions, with a screen size of 160×128 pixels. I2C is a communication protocol that allows multiple devices to connect to a single bus and communicate with one another using only two wires (SDA and SCL). This can make it a more efficient and cost-effective solution for connecting multiple devices in a project, as compared to using separate wires for each device.
DTH11 temperature sensor
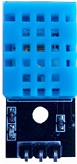
DHT11 is a low-cost digital temperature and humidity sensor. It can be used to measure temperature and humidity in a cooling system. The sensor uses a capacitive humidity sensor and a thermistor to measure the surrounding air, and sends digital signals to the controller or host device via a single-wire serial interface. The DHT11 sensor can provide accurate measurements within a range of 5% to 95% relative humidity and 0 to 50°C temperature. It can be integrated with a microcontroller or other control system to monitor and regulate the temperature and humidity in a cooling system.
5V fan
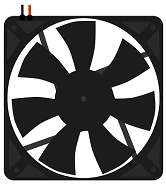
A 5V fan is a type of cooling fan that operates at a voltage of 5 volts. These types of fans are commonly used in computer systems to cool down components such as processors and graphics cards. They are also used in other electronic devices such as routers and other networking equipment. They typically draw less power than higher voltage fans and produce less noise.
relay

A relay is an electrically operated switch that can be used to control a 5V fan in combination with an ESP32 microcontroller. A relay allows the ESP32 to control a device that operates at a different voltage or current level than the ESP32.
A relay typically has a coil that is energized by an electric current, and a set of normally open or normally closed contacts. When the coil is energized, it creates a magnetic field that causes the contacts to move, either opening or closing a circuit.
To control a 5V fan with a relay and an ESP32, the relay‘s coil can be connected to a digital pin on the ESP32 and the fan can be connected to the normally open or normally closed contacts of the relay. The ESP32 can be programmed to send a signal to the relay‘s coil, causing the contacts to move and turning the fan on or off.
connecting wires

Connecting wires are used to connect various components in an electronic circuit. They allow for the transfer of electricity, data, or signals between different devices and components.
When connecting wires to an Arduino or other microcontroller, it is important to pay attention to the correct pinout. The pinout refers to the arrangement of pins on the microcontroller and the corresponding function of each pin. The Arduino pinout can be found in the documentation provided by the manufacturer, or in various resources available online.
Mounting
To complete the assembly, you can connect:
For relay
- Pin S to PIN1 of Arduino
- Pin (+) to 3.3V of Arduino
- Pin (-) to GND of Arduino
- Pin ON to 5V PIN of Arduino
For the fan:
- Pin (+) to COM Pin of relay
- Pin (-) to GND of Arduino
For DHT11 sensor:
- Pin DATA to Pin2 of Arduino.
- Pin VCC to 3.3V of Arduino
- Pin GND to GND of Arduino
For the LCD display:
-
the SDA pin at the Arduino analog pin A4.
-
the SCL pin at the Arduino analog pin A5.
-
the VCC pin at the Arduino 5v pin.
-
the GND pin at the Arduino GND pin
Program
This is the cooling system program.
|
1 2 3 4 5 6 7 8 9 10 11 12 13 14 15 16 17 18 19 20 21 22 23 24 25 26 27 28 29 30 31 32 33 |
#include <dht11.h> #include <LiquidCrystal_I2C.h> #define DHT11PIN 2 // DATA -> Pin 2 #define ventilateurPIN 1 // Pin -> for Fan LiquidCrystal_I2C lcd(0x27, 20, 4); dht11 DHT11; void setup() { pinMode(ventilateurPIN,OUTPUT); //sets the Pin 2 digital of the Arduino in output mode lcd.init(); } void loop() { DHT11.read(DHT11PIN); lcd.backlight(); lcd.clear(); lcd.setCursor(0, 0); lcd.print("temperature= "); lcd.setCursor(0,1); lcd.print((float)DHT11.temperature); if ((float)DHT11.temperature >28) { digitalWrite(ventilateurPIN,HIGH); // the fan starts to turn } else { digitalWrite(ventilateurPIN,LOW); // the fan stops } delay(2000); } |
Note: both libraries must be downloaded DTH11 et I2c_LCD1602
You can also see

4 commentaires
Leave a comment


Recent tutorials


Most viewed tutorials


Most commented tutorials


Scroll to Top
lcd panel manufacturing and tirupati china 28-11-2323
It's awesome in favor of me to have a web page, which is helpful designed for my know-how. thanks admin
카지노사이트 19-10-2323
Hi to every single one, it's in fact a pleasant for me to go to see this web page, it consists of important Information.
busttyy 23-05-2323
now the library has a problem how do we fix it?
ksw 21-04-2323
what if i'm using a dht22 instead of dht11?