Arduino Servo motor
Control servomotors by Arduino and Sensor Shield V5.0
But de ce tutoriel
Controlling servomotors with an Arduino and a Sensor Shield V5.0 is a relatively straightforward process. Here are the steps you can follow:
- Connect the Sensor Shield V5.0 to your Arduino board. Make sure that the power switch on the Sensor Shield is turned on.
- Connect the servomotor(s) to the Sensor Shield. The servomotor should have three wires: red, black, and white (or yellow). Connect the red wire to the 5V pin on the Sensor Shield, the black wire to the GND pin, and the white (or yellow) wire to one of the digital pins on the Sensor Shield (for example, pin 8).
- Write your Arduino code. Here is an example code to control a servomotor.
- Upload your code to the Arduino board using the Arduino IDE.
- Watch your servomotor move according to the code you wrote!
Necessary components
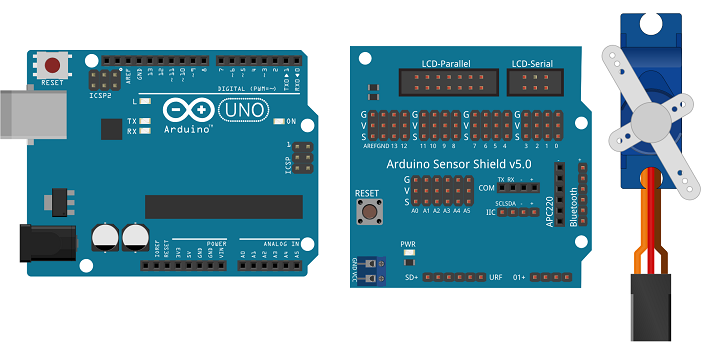
Arduino UNO

Arduino Uno is a microcontroller board based on the ATmega328P microcontroller. It is one of the most popular and widely used boards in the Arduino family. The board has 14 digital input/output pins, 6 analog input pins, a 16 MHz quartz crystal, a USB connection, a power jack, an ICSP header, and a reset button.
The digital pins on the board can be used as either input or output pins. The analog pins can be used to read analog voltage values from sensors or other devices.
The USB connection can be used to program the board and also to communicate with it over a serial connection. The power jack can be used to power the board using an external power supply, while the ICSP header can be used for in-circuit programming of the microcontroller.
The Arduino Uno board can be programmed using the Arduino IDE, which is a free, open-source development environment. The IDE provides a user-friendly interface for writing, uploading, and debugging code on the board. The Arduino language is based on C/C++, and there are a wide range of libraries and examples available to help users get started with the board and build their own projects.
Sensor Shield V5.0
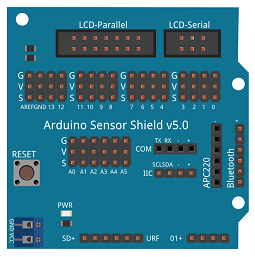
The Sensor Shield V5.0 is an add-on board designed for the Arduino microcontroller platform. It provides a convenient way to interface with various sensors and actuators, allowing you to quickly prototype and build projects that involve sensing and controlling the physical world.
The Sensor Shield V5.0 features a variety of input and output ports, including analog and digital pins, as well as ports for connecting I2C, SPI, and UART communication protocols. It also includes a voltage regulator, which allows you to power the Arduino and the attached sensors and actuators with a single power source.
The board is compatible with the Arduino Uno, Mega, and Leonardo microcontrollers, as well as other Arduino-compatible boards. It comes with a variety of pre-soldered connectors and headers, making it easy to plug in and start using right away.
With the Sensor Shield V5.0, you can easily connect sensors such as temperature sensors, humidity sensors, and light sensors, as well as actuators such as motors and servos. This makes it an ideal tool for prototyping and experimenting with robotics, automation, and other physical computing projects.
Servo motor

A servo motor is an electromechanical device that is commonly used in control systems to provide precise control of position, speed, and acceleration. It consists of a small electric motor connected to a feedback device, such as an encoder or potentiometer, which enables the motor to know its current position and make precise movements based on control signals.
Servo motors are commonly used in robotics, CNC machines, and other industrial applications where precise motion control is required. They are also found in many consumer products such as RC cars, drones, and hobbyist robotics.
One of the advantages of servo motors is their ability to maintain a steady speed even under varying load conditions. They are also capable of providing high torque output and precise positioning accuracy. Servo motors can be controlled using a variety of methods, including analog signals, pulse-width modulation (PWM), and digital signals.
9V Battery
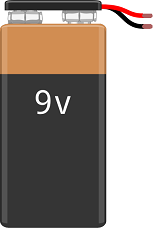
A 9V battery is a small, rectangular-shaped battery that provides a nominal voltage of 9 volts. It is commonly used in a wide range of electronic devices, such as smoke detectors, portable radios, and guitar effects pedals, among others.
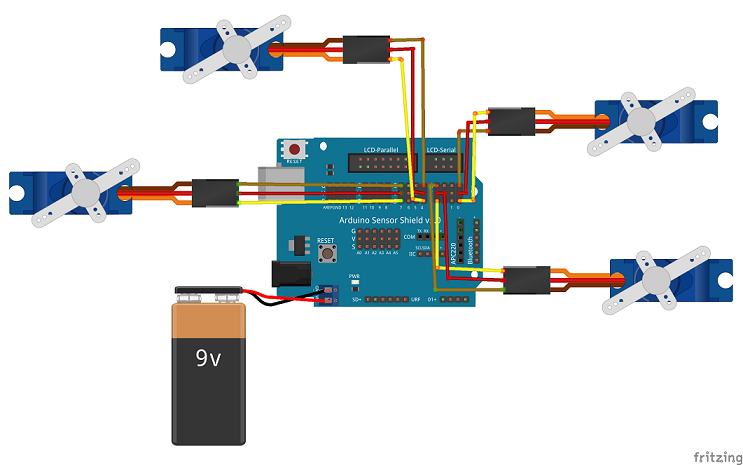
Assembly
1- Connect the Shield Sensor V5.0 to the Arduino UNO board
2- Connect the first servomotor to port N°0 of the Shield Sensor V5.0
3- Connect the second servomotor to port N°3 of the Shield Sensor V5.0
4- Connect the third servomotor to port N°4 of the Shield Sensor V5.0
5- Connect the fourth servomotor to port N°7 of the Shield Sensor V5.0
Arduino program
Here is the Arduino program which allows four servo motors to be controlled by the Arduino and the Shield Sensor V5.0
|
1 2 3 4 5 6 7 8 9 10 11 12 13 14 15 16 17 18 19 20 21 22 23 24 25 26 27 28 29 30 31 32 33 34 35 36 37 38 39 40 41 42 43 44 45 46 47 48 49 50 51 52 53 54 55 56 57 58 59 60 61 62 63 |
#include <Servo.h> Servo servo1; // create servo object to control a servo Servo servo2; // create servo object to control a servo Servo servo3; // create servo object to control a servo Servo servo4; // create servo object to control a servo int pos = 0; // variable to store the servo position void setup() { servo1.attach(0); // attaches the servo on pin 0 servo2.attach(3); // attaches the servo on pin 3 servo3.attach(4); // attaches the servo on pin 4 servo4.attach(7); // attaches the servo on pin 7 servo1.write(0); servo2.write(0); servo3.write(0); servo4.write(0); } void loop() { for (pos = 0; pos <= 180; pos += 1) { // goes from 0 degrees to 180 degrees // in steps of 1 degree servo1.write(pos); // tell servo1 to go to position in variable 'pos' delay(15); // waits 15ms for the servo to reach the position } for (pos = 0; pos <= 180; pos += 1) { // goes from 0 degrees to 180 degrees // in steps of 1 degree servo2.write(pos); // tell servo2 to go to position in variable 'pos' delay(15); // waits 15ms for the servo to reach the position } for (pos = 0; pos <= 180; pos += 1) { // goes from 0 degrees to 180 degrees // in steps of 1 degree servo3.write(pos); // tell servo3 to go to position in variable 'pos' delay(15); // waits 15ms for the servo to reach the position } for (pos = 0; pos <= 180; pos += 1) { // goes from 0 degrees to 180 degrees // in steps of 1 degree servo4.write(pos); // tell servo4 to go to position in variable 'pos' delay(15); // waits 15ms for the servo to reach the position } for (pos = 180; pos >= 0; pos -= 1) { // goes from 180 degrees to 0 degrees servo1.write(pos); // tell servo1 to go to position in variable 'pos' delay(15); // waits 15ms for the servo to reach the position } for (pos = 180; pos >= 0; pos -= 1) { // goes from 180 degrees to 0 degrees servo2.write(pos); // tell servo2 to go to position in variable 'pos' delay(15); // waits 15ms for the servo to reach the position } for (pos = 180; pos >= 0; pos -= 1) { // goes from 180 degrees to 0 degrees servo3.write(pos); // tell servo3 to go to position in variable 'pos' delay(15); // waits 15ms for the servo to reach the position } for (pos = 180; pos >= 0; pos -= 1) { // goes from 180 degrees to 0 degrees servo4.write(pos); // tell servo4 to go to position in variable 'pos' delay(15); // waits 15ms for the servo to reach the position } } |
You can also see

0 commentaire
Leave a comment


Recent tutorials


Most viewed tutorials


Most commented tutorials


Scroll to Top