Arduino Servo motor
Controlling a servo motor with Arduino
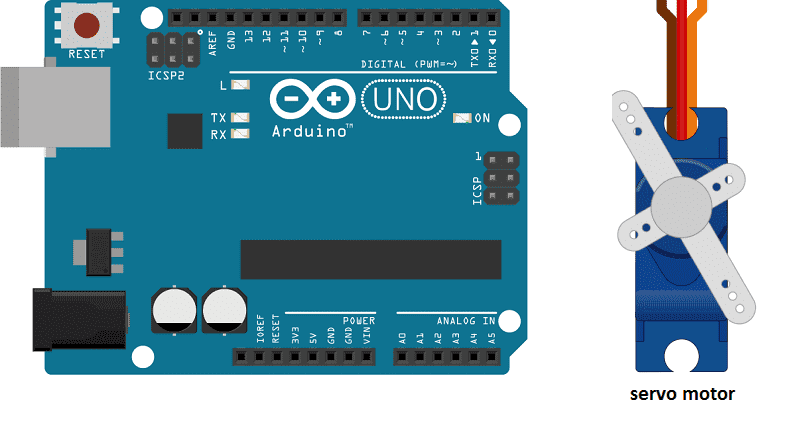
A servo motor is a type of motor that is commonly used in robotics and automation projects to control the position of an object. Servo motors can rotate to a specific angle and maintain that position, making them ideal for applications such as robotic arms, camera gimbals, and other positioning systems.
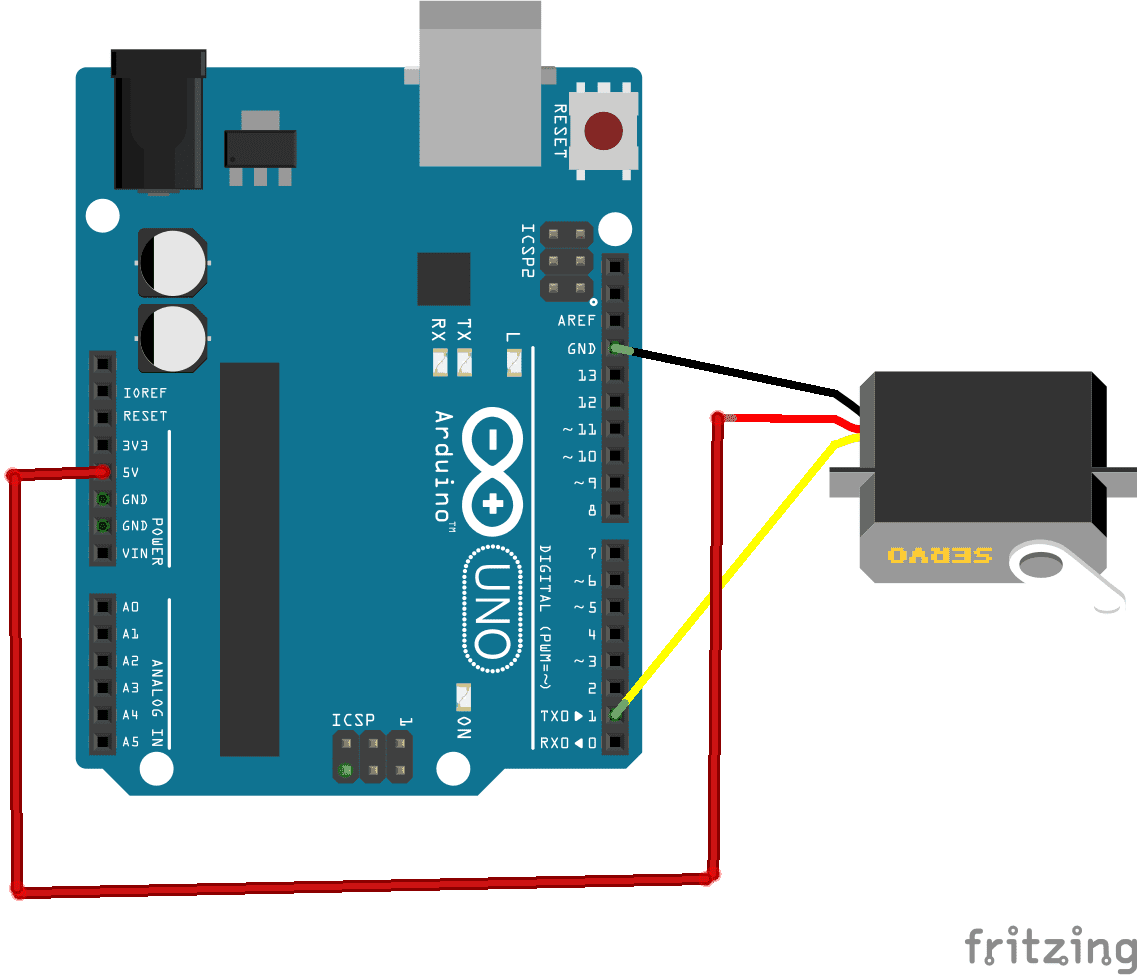
To control a servo motor with an Arduino, you will need to connect the servo motor to the Arduino board using wires. Servo motors typically have three wires: power (usually red), ground (usually black), and control (usually white or yellow). The power and ground wires should be connected to the 5V and GND pins on the Arduino, and the control wire should be connected to a digital pin (for example, pin 9).
Once the servo motor is connected, you can use the Arduino‘s Servo library to control the position of the servo motor. The Servo library provides several functions for controlling a servo motor, including:
- attach(): attaches a servo motor to a specific pin on the Arduino
- write(): sets the position of the servo motor to a specific angle
- read(): reads the current position of the servo motor
- detach(): detaches the servo motor from the pin on the Arduino
Purpose of this tutorial:
In this tutorial we will test the servo motor by scanning an angular range in one direction then in the other:
- It is positioned at the 0° angle
- It is positioned at the 180° angle.
- we return to step 1
Necessary components
Arduino UNO

The Arduino UNO is a microcontroller board based on the ATmega328P. It has 14 digital input/output pins, 6 analog inputs, a 16 MHz quartz crystal, a USB connection, a power jack, an ICSP header, and a reset button. It is the most popular and widely used board among the Arduino boards.
The Arduino UNO can be programmed using the Arduino programming language, which is based on C++. It uses a simple and intuitive programming environment, making it easy for beginners to get started with microcontroller programming.
The Arduino UNO can be connected to various sensors and actuators to control different devices and perform different tasks. For example, it can be used to control motors, read data from sensors, display information on an LCD screen, and communicate with other devices via serial communication protocols such as I2C and SPI.
The Arduino UNO can also be powered by a USB cable or an external power supply, making it easy to use in a wide range of projects and applications. It’s compatible with a wide range of shields (expansion boards) that adds functionality to the board, such as Ethernet, WiFi, and Bluetooth, and it’s widely supported by a strong and active community, which provides a lot of tutorials, examples and libraries to help users to get the most of the board.
Servo motor

A servo motor is a type of motor that is commonly used in robotics and automation projects to control the position of an object. It is designed to rotate to a specific angle and maintain that position, which makes it ideal for applications such as robotic arms, camera gimbals, and other positioning systems.
A servo motor is made up of three main components: a DC motor, a gear train, and a control circuit. The DC motor provides the power to rotate the shaft of the servo, the gear train is used to reduce the speed of the motor and increase the torque, and the control circuit is used to control the position of the motor.
The control circuit of a servo motor typically includes a feedback mechanism, such as a potentiometer, that is used to determine the position of the motor’s shaft. The control circuit compares the feedback signal to a control signal that is received from a controller, such as an Arduino, and adjusts the motor’s position accordingly.
Servo motors come in different types and sizes, and they have different specifications such as:
- Torque: the amount of force the motor can exert on the load
- Speed: the rate at which the motor can rotate
- Angle range: the range of angles the motor can rotate to
- Power consumption: the amount of power required to operate the motor
Servo motors are widely used in robotics, RC cars and planes, CNC machines, and other applications that require precise control of movement. They can be controlled by a microcontroller such as Arduino, PIC Microcontroller or by a dedicated servo controller.
connecting wires

Connecting wires are used to connect various components in an electronic circuit. They allow for the transfer of electricity, data, or signals between different devices and components.
When connecting wires to an Arduino or other microcontroller, it is important to pay attention to the correct pinout. The pinout refers to the arrangement of pins on the microcontroller and the corresponding function of each pin. The Arduino pinout can be found in the documentation provided by the manufacturer, or in various resources available online.
Mounting of servo motor wtih Arduino:
- Red: power wire to be connected to the 5V pin of the Arduino
- Brown: wire to be connected to the GND pin of the Arduino
- Yellow: positioning signal wire connected to the digital Pin 1 of the Arduino.
Program
Here is the program that allows to turn a servomotor by the Arduino.
|
1 2 3 4 5 6 7 8 9 10 11 12 13 14 15 |
#include <Servo.h> Servo monServomoteur; void setup() { // Attaches the servomotor to PIN 1 of Arduino monServomoteur.attach(1); } void loop() { // Moves the servo motor from 0° to 180° for (int position = 0; position <= 180; position++) { monServomoteur.write(position); delay(15); } } |
You can also see

0 commentaire
Leave a comment


Recent tutorials


Most viewed tutorials


Most commented tutorials


Scroll to Top